| Platform/Product/Module: | ClubSpark/Igloohome App |
| Function: | Unlink your existing Igloohome lock and add your new one. |
Step 1: Remove your old Igloohome Lock from the ClubSpark Software
1.
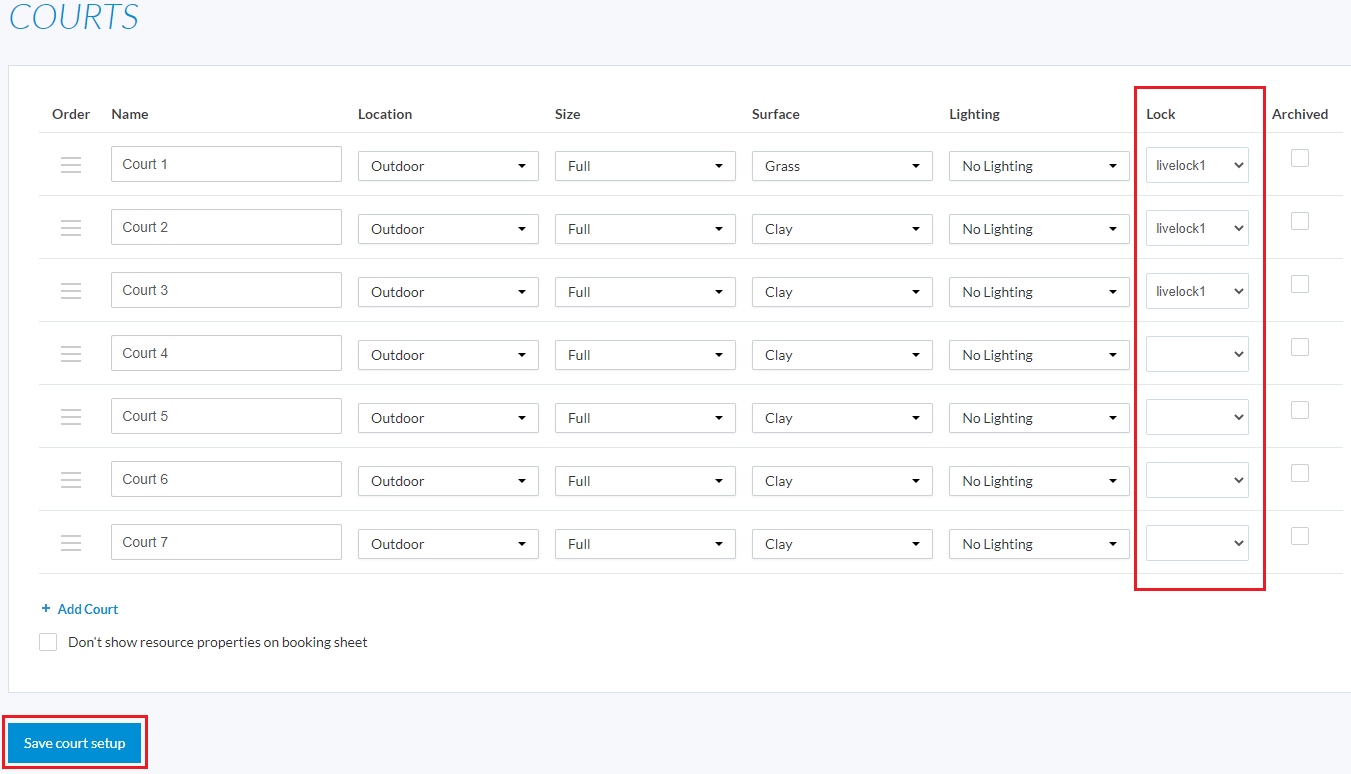
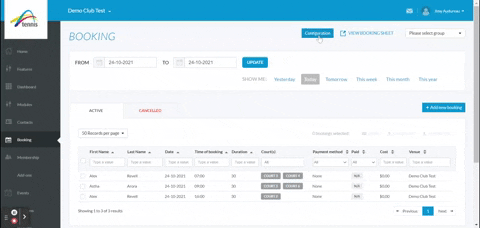
Head to the Booking module and click on Configuration at the top right corner, then click on Manage Courts under ‘Courts’, and deselect your lock under ‘locks’ for each court it is assigned to and click save court setup at the bottom of the page.
2.
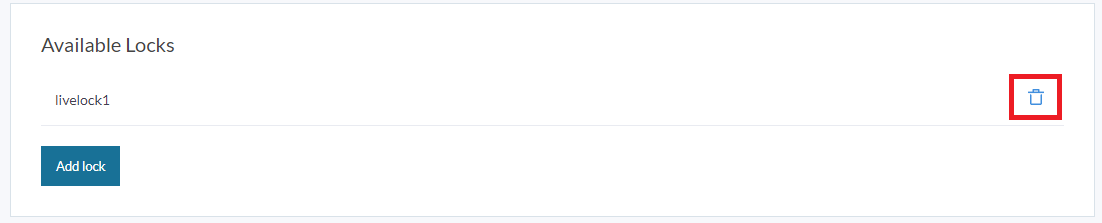
Head back to the Booking module , click on Configuration and then Manage Settings under ‘Booking Settings’. Scroll down to the bottom of the page to Available Locks and click the recycle bin icon to remove the lock from the ClubSpark software and click confirm to remove the lock.
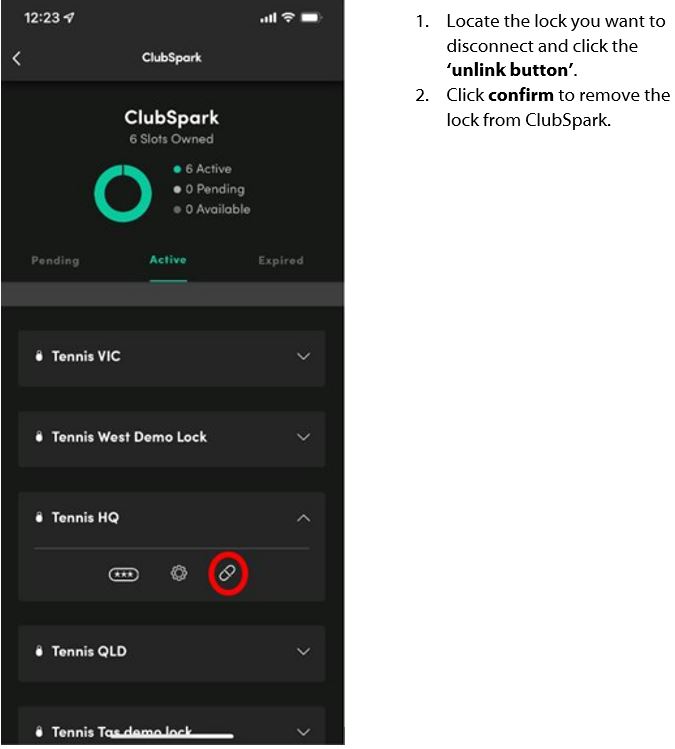
Step 2: Disconnect your old Igloohome Lock from ClubSpark via the Igloohome App
1.
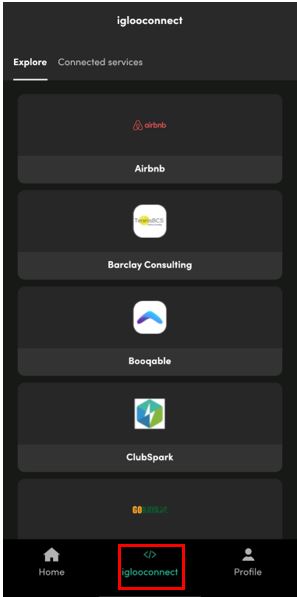
Log into the Igloohome App on your mobile phone and click on the Iglooconnect tab from the bottom of the screen.
2.
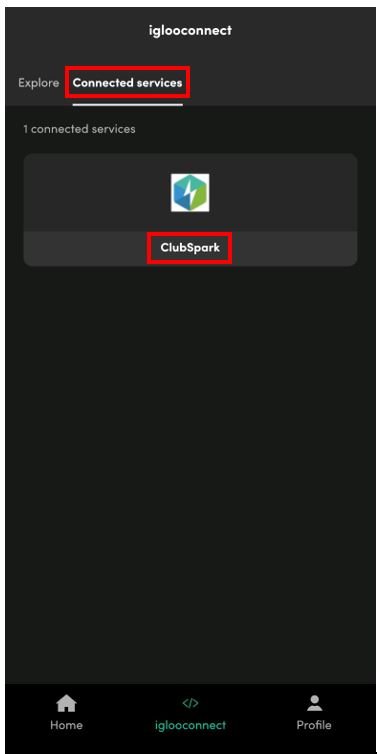
Click on Connected services tab from the top of the screen and select ClubSpark.
3.
Note:
Disconnecting your Igloohome lock will not cancel your exchange code subscription. If you want to cancel your subscription please click here for a guide.
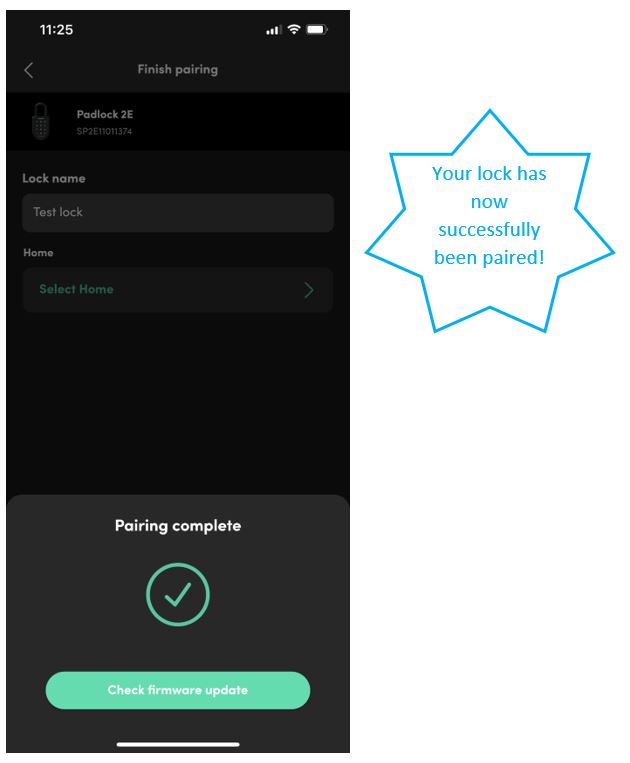
Step 3: Pairing your Igloohome 2E lock with your existing Igloohome account
1.
Click the ‘+’ icon and select ‘Pair lock or device’

2 & 3.
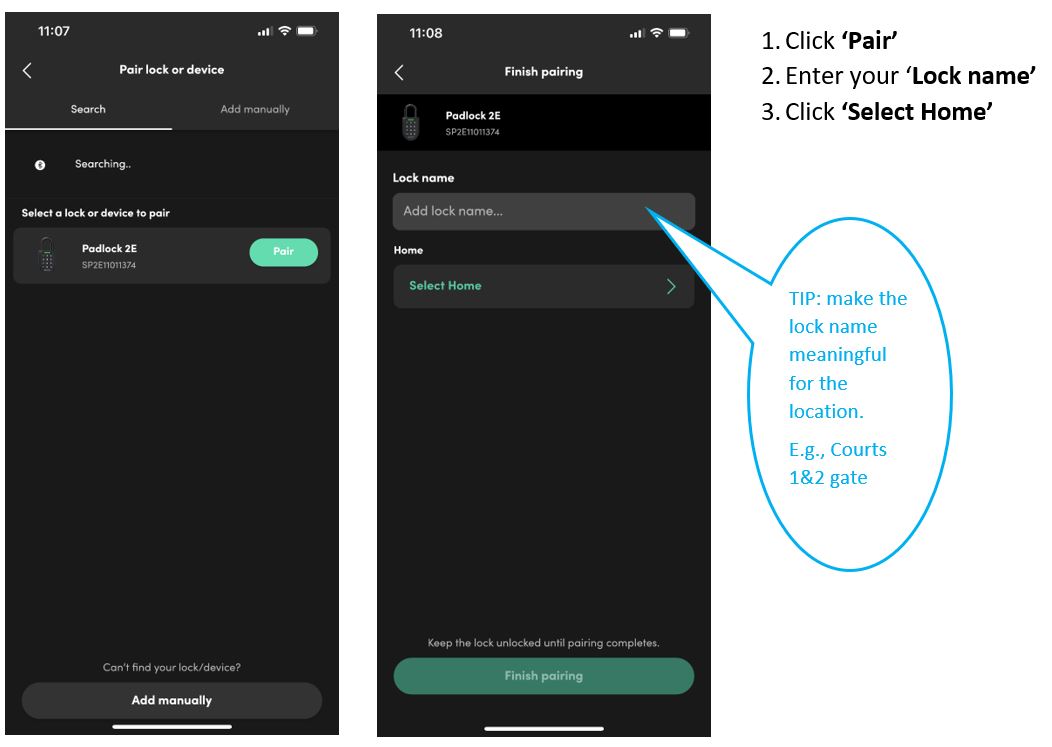
4 & 5.
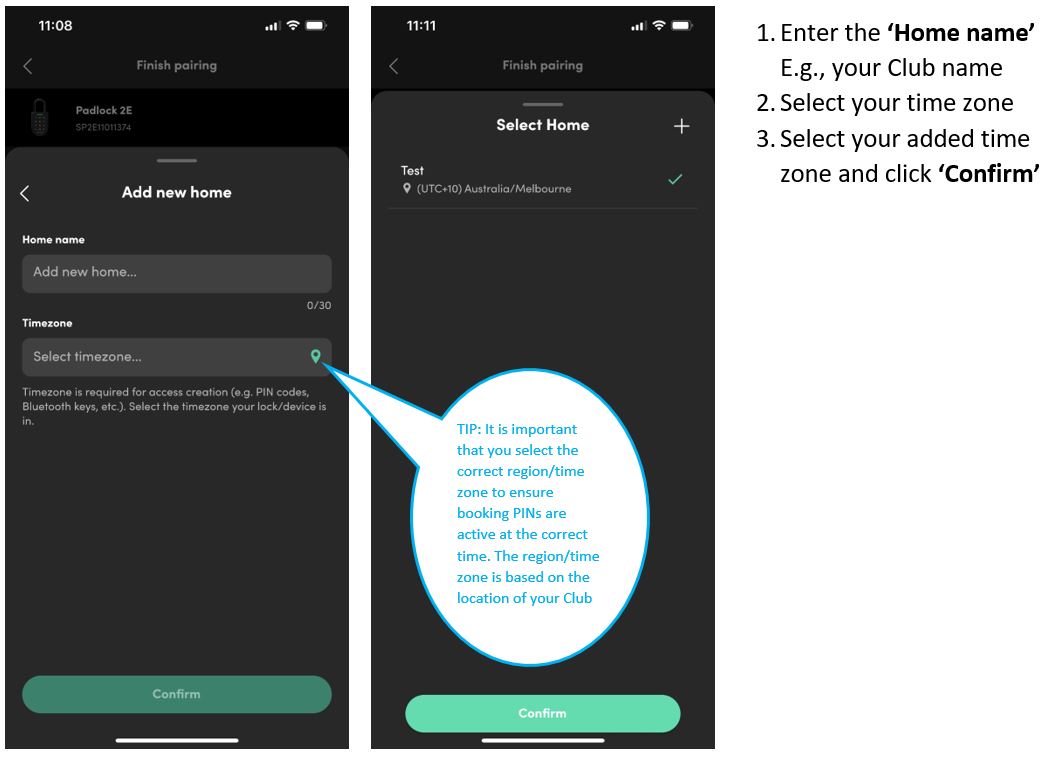
6.
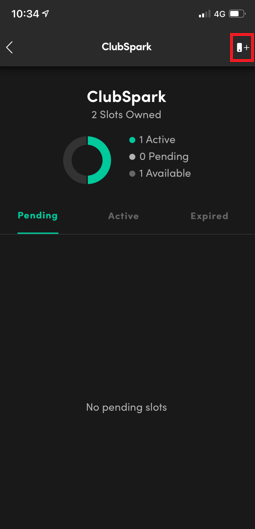
Step 4: Generating the exchange code via Igloohome App
Note: You DO NOT need to purchase another exchange code slot
1.
Return to the Igloohome App on your mobile device and select the Iglooconnect tab from the bottom of the screen, as shown below.
2.
Then click the Connected services tab from the top of the screen and select ClubSpark.
3.
Click on the Add Lock+ icon as shown below.
4.
Then select the lock you want to generate an exchange code for and click Connect.
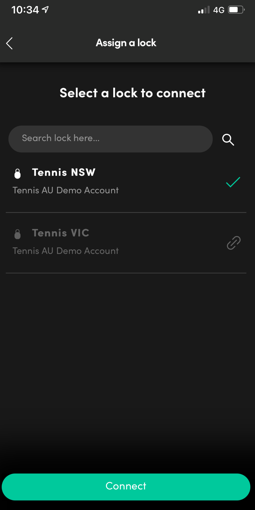
5.
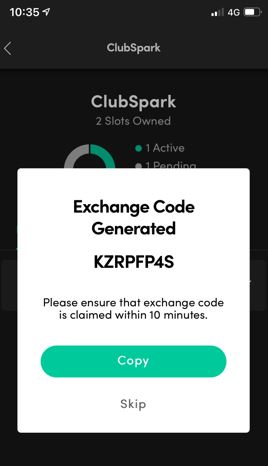
Your exchange code will now appear on screen, as shown below.
Note:
We recommend writing this down or copying it to your Notes App on your phone until the exchange code has been used to connect the lock with ClubSpark.
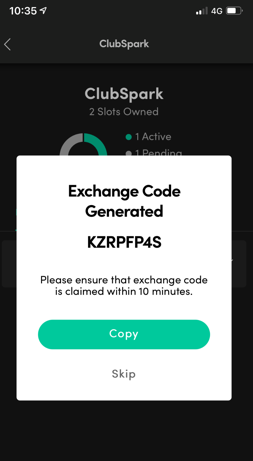
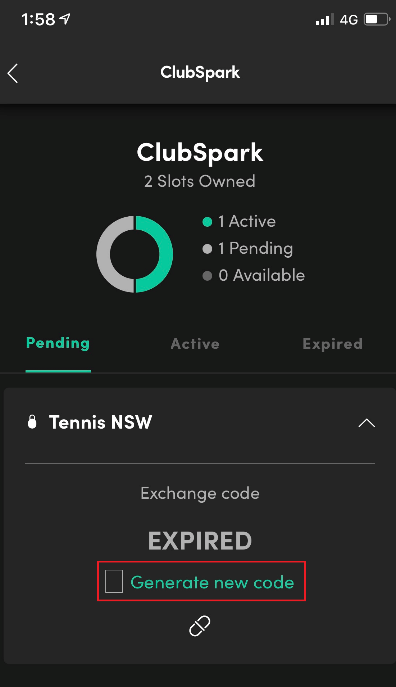
IMPORTANT: The exchange code is required to be claimed within 10 minutes, otherwise the exchange code provided will expire and a new code will need to be generated, as shown below.
You can now proceed with adding your lock to the ClubSpark software, use the following guide to assist you through this process.
Step 5: Add your new Igloohome 2E Lock to ClubSpark
1.
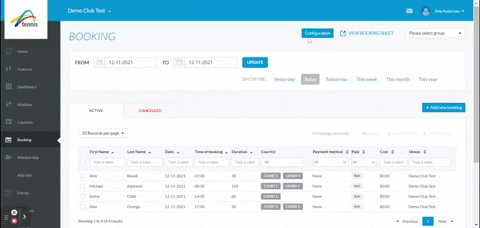
Head to the Booking module and click on Configuration at the top right corner. To connect your lock(s) to the software, click on Manage Settings under the ‘Booking Settings’ heading, as shown below.
2.
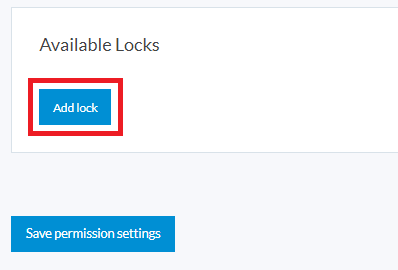
Scroll to the bottom of the page and under the heading ‘Available Locks’ (as shown below), click Add Lock to add your Igloohome 2E lock.
Note:
This setting is only available to super administrators of the club. If you’re not a super administrator, please contact your super administrator to add the lock for you or upgrade your access levels.
3.
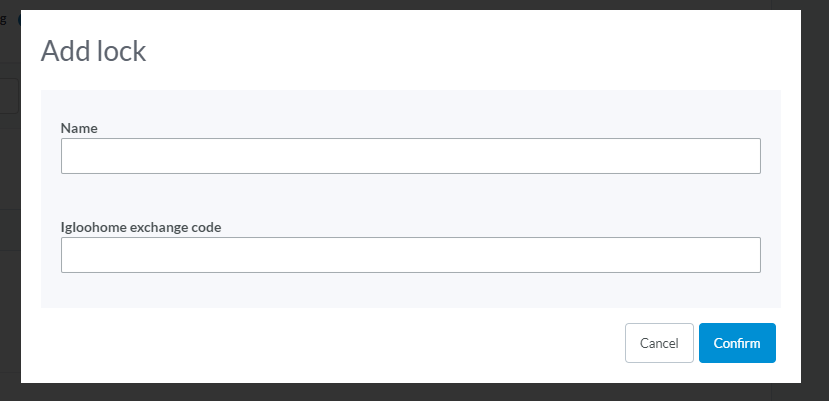
Once you click, Add lock, the following overlay will appear:
4.
Enter your preferred name of the lock.
Examples: “Entry gate” or “Courts 1-4”.
5.
Enter the exchange code generated within the Igloohome App (see image below).
6.
Click Confirm.
Your lock will then appear as an “Available lock”, as shown below. If you have multiple locks, repeat the same steps.
Step 6: Assign the Igloohome 2E lock to your courts
The next step is to assign the lock to the appropriate courts at your venue. This will determine what bookings on a specific court will unlock the lock via booking pin.
Note:
- If you have one lock that will provide access to all courts at your venue: you will assign the lock to each court.
- If you have multiple locks (due to the courts being separated by enclosures): you have the ability to limit access to the courts by only assigning the lock to the courts specific for that enclosure. For example, one lock would be assigned to Courts 1-4 and the second lock would be assigned to Courts 5-8. This means that if a user was to book Court 1, their booking pin will only provide access to the enclosure for Courts 1-4.
- If you have multiple locks: you cannot assign more than one lock to a court as this will result in a pin not being generated for bookings on this court. Further software development is needed in order for this to be possible.
1.
To assign the lock to the court(s) go to Configuration within the Booking module and click Manage Courts under the Courts heading, as shown below.
2.
Use the drop down menu under the Lock column and select the available lock(s) for each court.
Note:
It may take a few minutes for the lock to display within the drop down menu after the lock has been added.
3.
Once the lock has been assigned to the appropriate court(s), click Save court setup.
Your lock(s) will now provide access for bookings made online via ClubSpark – we recommend that you make some bookings to test this yourself before making courts available online to members and the general public.