| Platform/Product/Module: | Clubspark – BCS |
| Function: | Connect your Light Controller with ClubSpark to link online booking with your lightning system |
To provide players who have made an online booking via Clubspark with the ability to activate court lighting using a lighting pin on the BCS Lighting external keypad, club admins will need to add their BCS Light Controller to the Clubspark software, connect the controller/relay to the appropriate court, and turn on the lights toggle within your schedule rulesets.
Step 1: Assign a Lighting Provider in Clubspark Booking Settings
1.
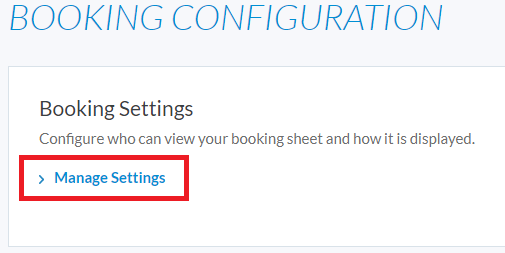
Head to the Booking module and click on ‘Settings’, then click on ‘Manage basic settings’ under the Basic Settings heading, as shown below.
2.
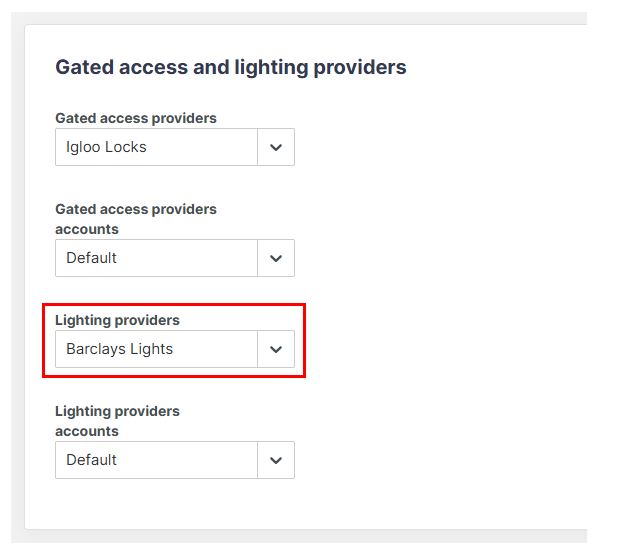
Scroll to the bottom of the page and under the heading Gate access and lighting providers, click on the dropdown menu for ‘Lighting providers’ and select ‘Barclays Lights’ as shown below.
3.
This will then display the ability to add controllers under the heading ‘Barclays Lights’ (as shown below), click Add controller.

4.
The following overlay will appear:
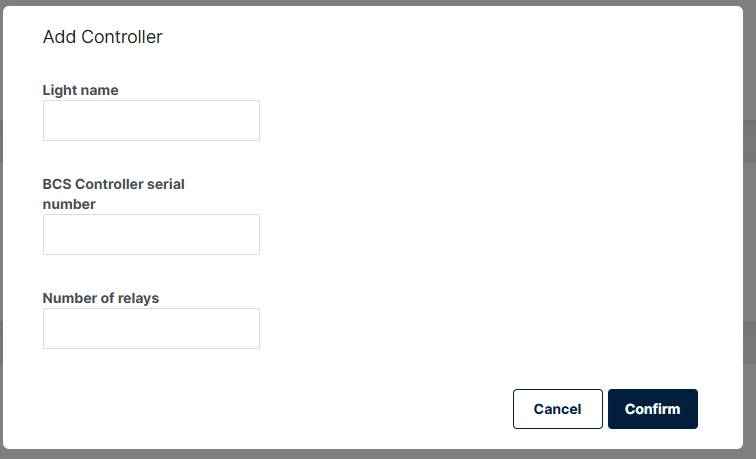
Enter your preferred name for the controller (e.g “Light control” or “Lights 1-4”).
Enter the BCS Controller serial number, which is displayed on the LED screen of the BCS Court Light Controller.
Enter the total number of COURTS that are added to Clubspark in the Number of relays box.
Then click Confirm.
Note:
If you have multiple controllers, repeat this process and ensure you’re entering the appropriate serial number for each controller.
5.
Your controller will then appear as an “Available Controller”, as shown below.

Note:
If required, you can remove the connected controller by clicking on the Bin icon and then clicking Confirm (to reconnect the controller, you will be required to enter the serial number again).
Step 2: Assign BCS controllers to the Courts
The next step is to assign the controller to the appropriate courts at your venue. This will determine what courts will provide a lightning pin to court bookers.
Note:
If you have one controller that will activate lights to all courts at your venue, then you will assign that controller to each court. If you have multiple controllers, then you will need to differentiate which courts will be operating on each controller.
1.
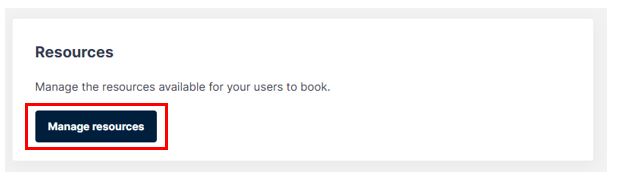
To assign the controllers to the courts go to Settings within the Booking module and click Manage resources under the Resources heading.
2.
Click ‘edit‘ against the appropriate court/resource
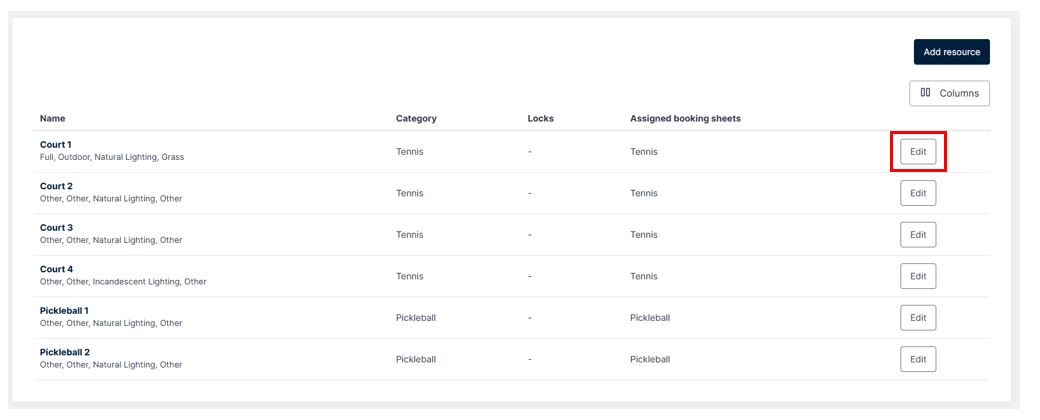
3.
Use the drop down menu under Locks to select the appropriate light relay for each court.
Example:
Select “Light – 01” for Court 1,
“Light – 02” for Court 2, and so on.

Note: The light relay number must match the court number it’s being assigned to. For example, Light (3) must be linked to Court 3. If the numbers don’t match, the incorrect court lights may activate.
Step 3: Activate the Lights toggle within your schedule rulesets.
1.
To activate the lights toggle, go to Settings within the Booking module, click Manage schedules under ‘Schedules’ and click manage on your appropriate schedule.


2.
Click edit on the ruleset you want lights to activate for.
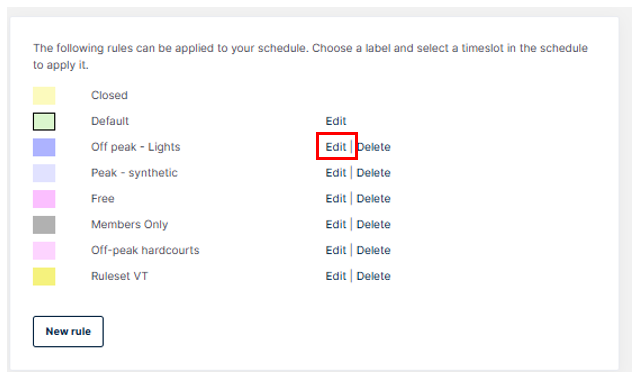
3.
Toggle your lights to On.

4.
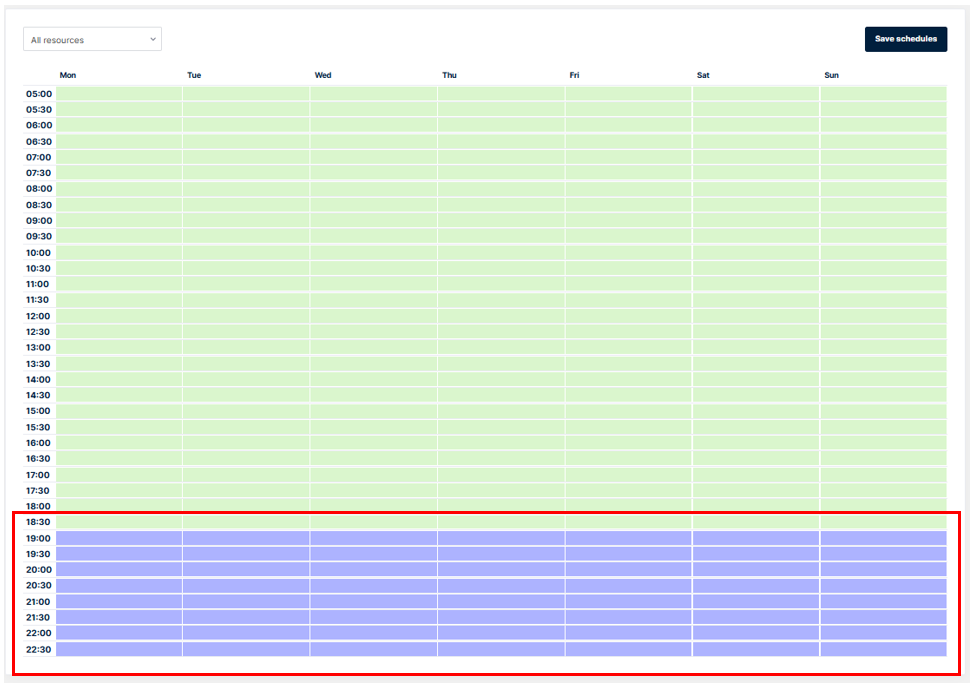
Make sure your lights ruleset is included in your schedule for the time you want a light PIN to be generated for bookings.
For example, in the image below, the lights ruleset (shown in purple) starts at 7:00 pm, meaning a light PIN will only be generated for bookings from 7:00 pm onwards.
Click here for a support article on how to apply your ruleset to your schedules.
Note: if you have the BCS Gate Solution installed, the lights toggle must always be toggled to on to ensure you receive a PIN to access the gate.
Your court light controller(s) will now provide lighting pins for bookings made online via Clubspark and will activate court lights according to your configuration of the court light controller – we recommend that you make some bookings to test this yourself before making courts available online to members and the general public.
| Need more help? | If you’re having any difficulties with any of the above, please refer to the FAQ available here or contact your State Representative or the Customer Support Team on 1800 752 983 / [email protected]. |