| Platform/Product/Module: | ClubSpark – Profile |
| Function: | How to add consents (Marketing opt ins, newsletter, club’s comm, photography rights, etc.) |
The ClubSpark platform allows you to create up to 10 consents which you can ask your members to opt-in or out of when they register to your venue for the first time.
The consents follow privacy compliance and are ‘Opt-in’. Consents can be changed by the user on their own profile page, you can send our Changing Consents guide to your members if they would like to change what they have opted-in or out of.
This guide will provide steps for the following:
- Adding A New Consent
- Editing Consents
Adding A New Consent
1.
To add consents to your account, you will first need to head to Profile, here you will need to click on the ‘Consents‘ tab situated in the top right corner underneath your name.
Once you have clicked on the ‘Consents‘ tab, you should be taken to the following page:
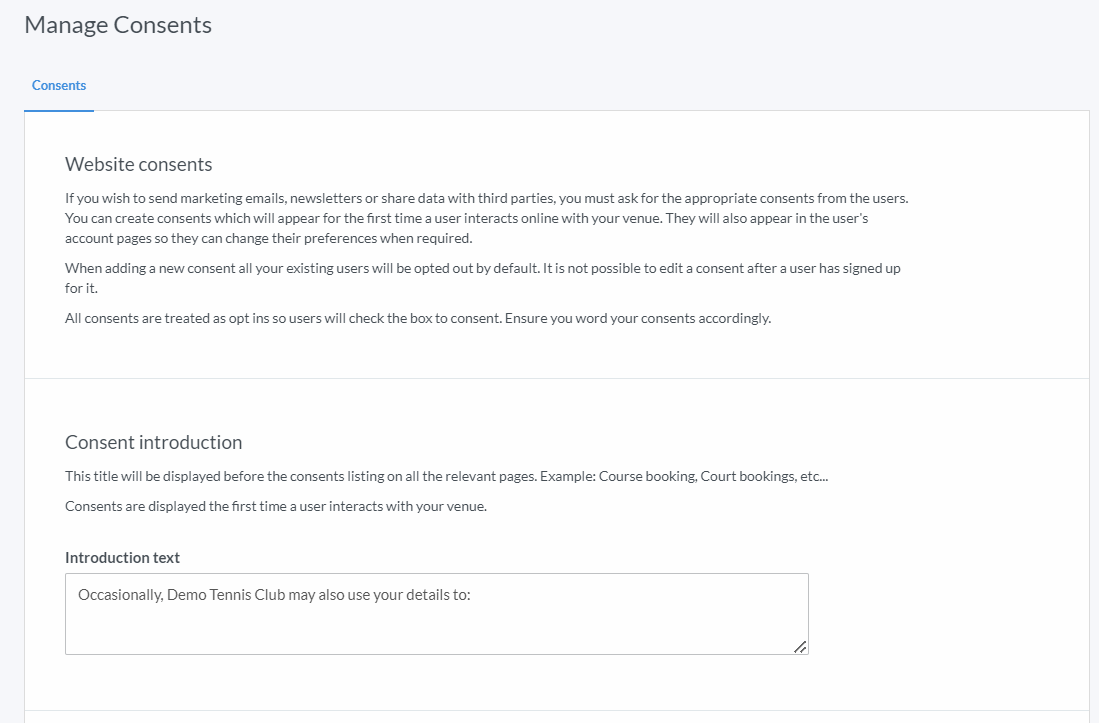
Here you will be able to edit/enter your own introduction text such as: “Occasionally, [Club’s Name] may also use your details to:” (limited to 100 characters)
2.
Below, you will be able to enter your up to 10 consents by clicking on the ‘Add New Consent‘ button

3.
The following overlay should appear:
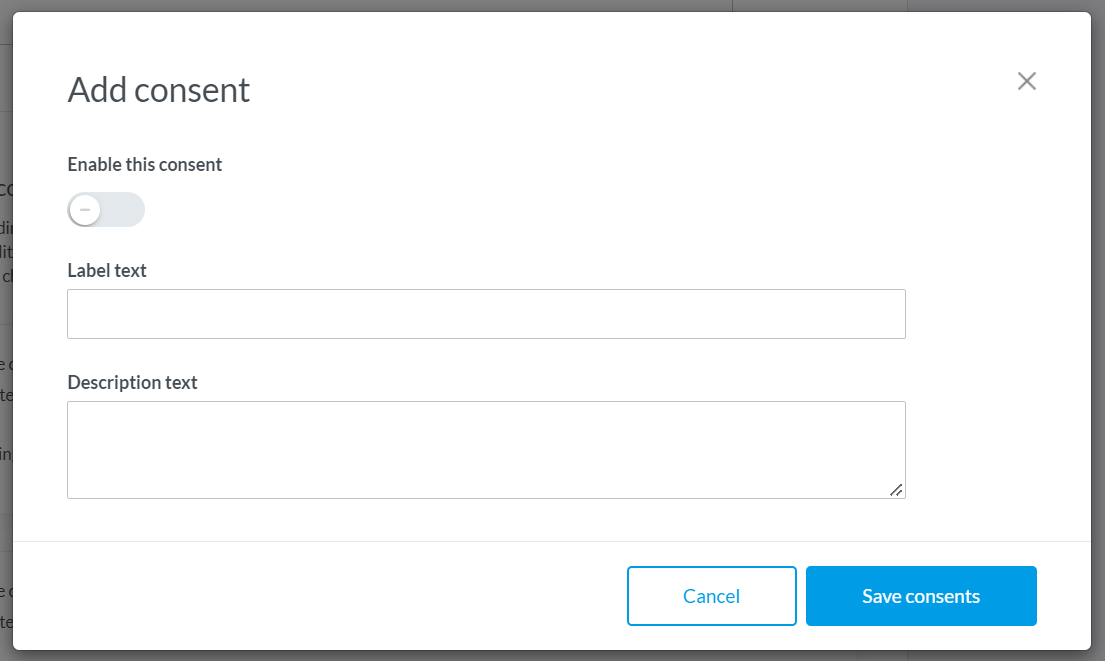
Here you will be able to enter your consent name in Label Text and what the member will be opting-in or out of in Descriptive Text.
Before clicking the blue ‘Save Consent’s button, remember to tick ‘Enable This Consent‘.
4.
Your new consent will now be visible when someone registers to your venue for the first time and within their member’s profile to opt-in or out of.
Editing Consents
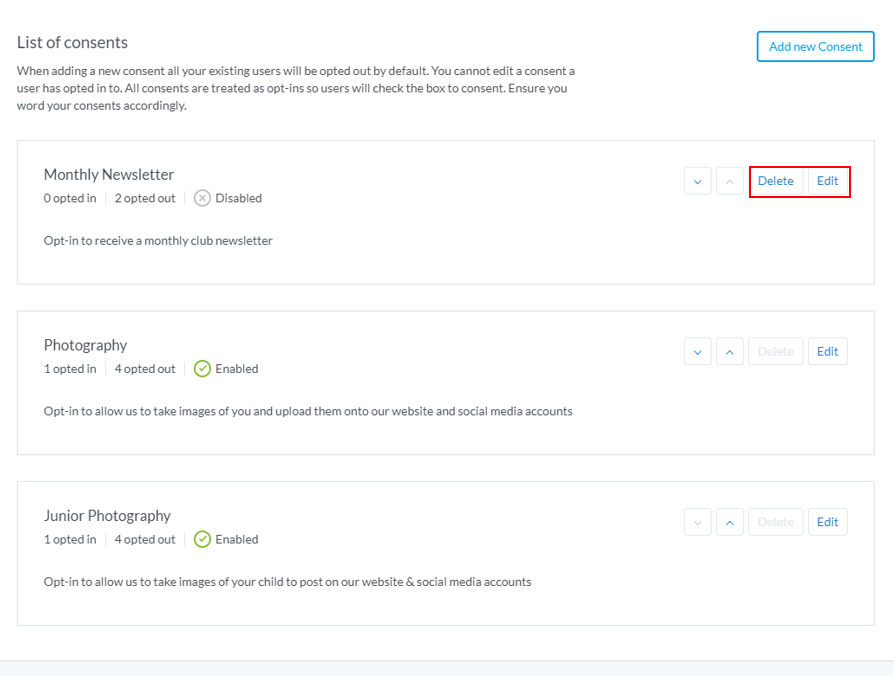
You may already have consents set up that are no longer needed on your account, below are the steps in how you can edit, disable or delete your consents.
Please Note: If a consent has been opted-in or out of you will not be able to edit the text, you will only be able to disable it and delete it.
Editing or Disable a Consent
1.
Once you are within the Profile module in the admin area and looking at your consents, click on ‘Edit‘
2.
The following overlay will appear:
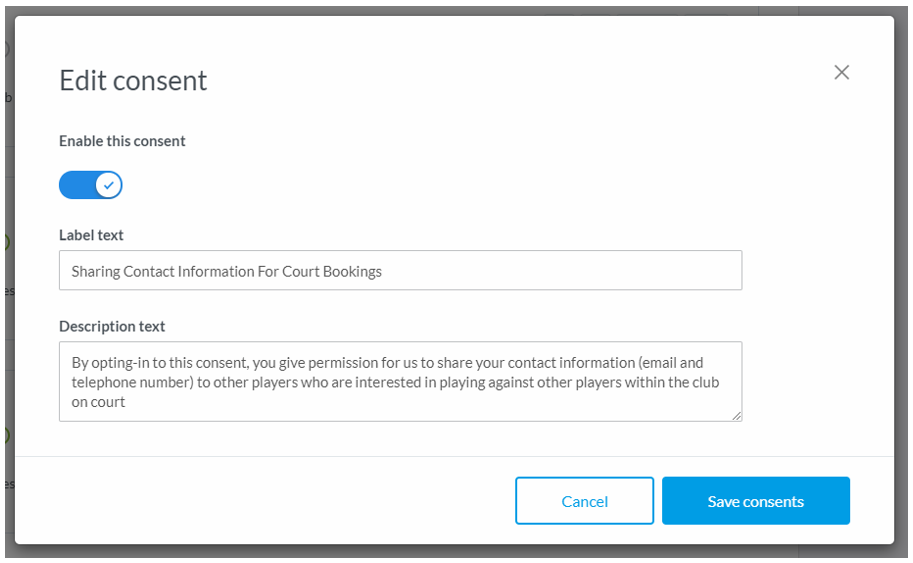
Here you will be able to disable the consent, change the label and description text.
Note: Once you have disabled this consent by ticking the toggle button to grey, it will no longer appear as a consent to your members to opt-in or out of. If you wish to re-enable to consent, you will need to click the toggle again to turn back to blue.
3.
Once you are happy with the changes, remember to click the blue ‘Save consents‘ button in the bottom right corner of the overlay.
Deleting A Consent
1.
Once you have disabled a consent, you will be able to delete it.
To do that You will need to click on the ‘Delete‘ button next to the consent that you wish to remove.
2.
The following overlay will then appear:
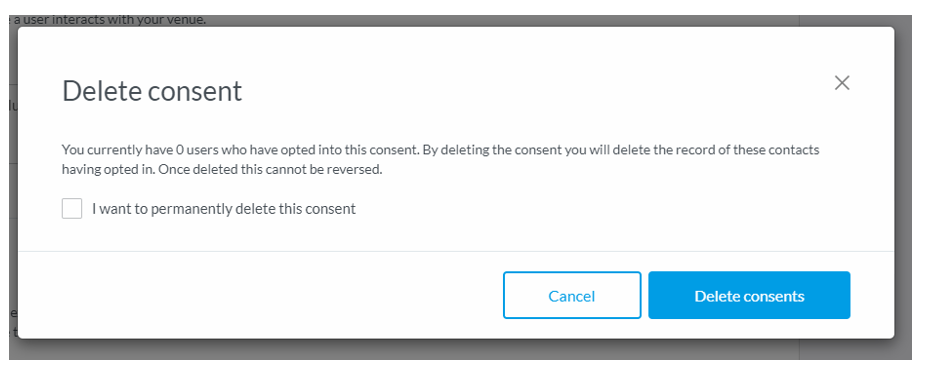
Here you will need to confirm that you want to permanently delete this consent.
3.
Once you have ticked the confirmation box, you will then need to click the blue ‘Delete Consent‘ button.
| Need more help? | Contact Customer Support on 1800 752 983 or email [email protected] |