Support Centre
Find all the answers to your question
Important Notice: Single sign in now live. For more information Click HERE
Find all the answers to your question
New Discount Codes:
Venues can now self-create and track Discount Code (Promo Code) use for bookings in real time, no longer needing to go through Clubspark.
You can create Discount Codes for members, players, guests or friends to receive a discount when making a booking for court bookings and Program courses, camps, and coaching sessions.
Please Note (15/09/2025):
Discount promo codes can only be redeemed directly through the tennis venue’s booking website. Promo codes cannot be redeemed on Play.Tennis, the user will see an error message, even if the code is valid. With the change to Tennis.com.au, users will be able to use Promo codes on both Tennis.com.au and at the venue level.
Step 1:
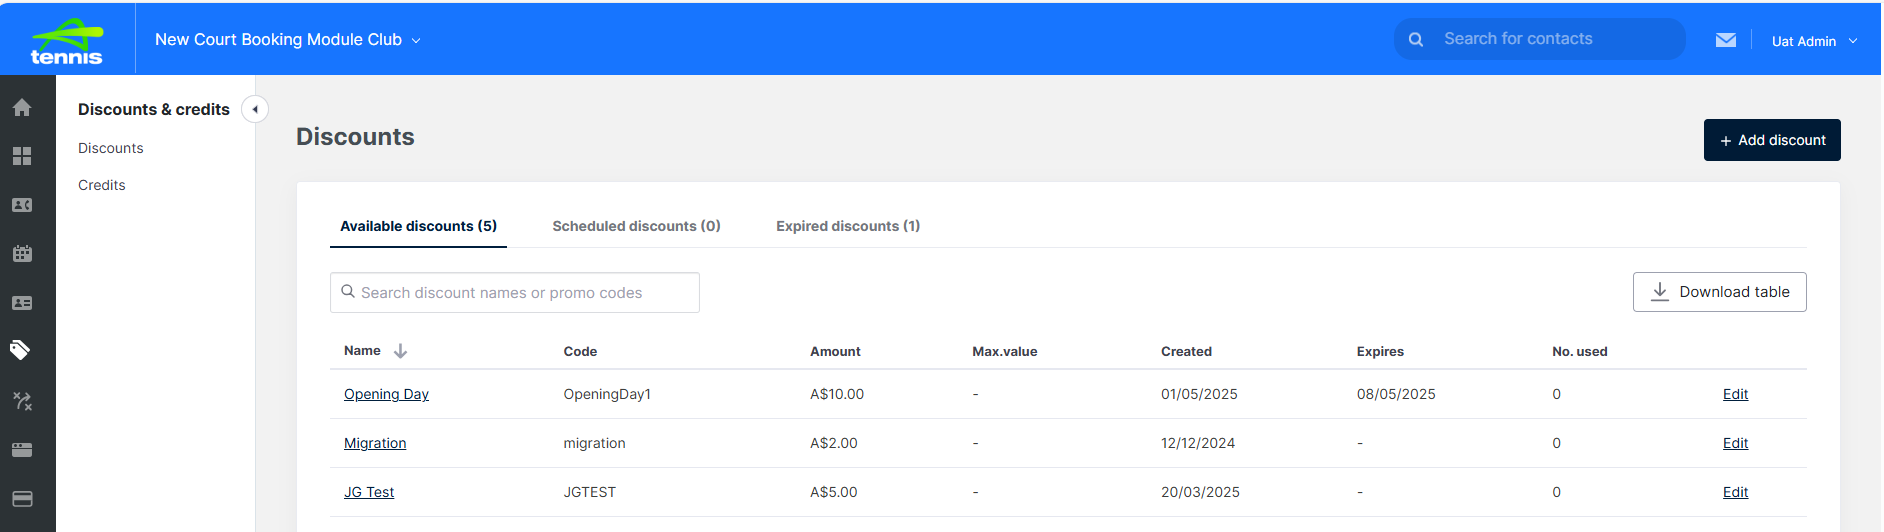
Navigate to the “Discounts” Module using the navigation panel on the left and select “Add Discount” button on top right of page once within the Discounts area:
Step 2:
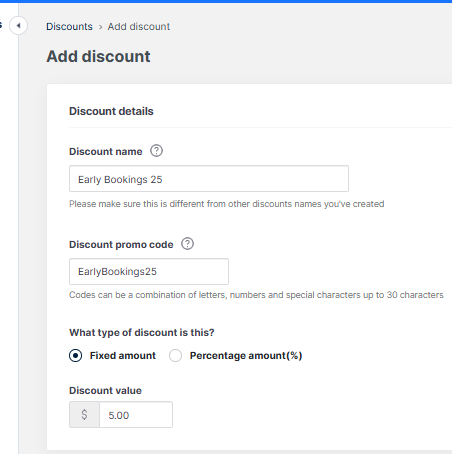
Beneath Discount Details, add a Discount Name and Discount promo code, using the following guidelines (select Tooltip (?) next to Discount name or Discount promo code also for assistance)
Discount names need to be unique:
You:
e.g. ‘Early Bookings 25’ for a Discount Code and ‘EarlyBookings25′ for a Discount promo code are suitable options.
Select a Fixed amount in dollars OR Percentage amount for the Discount in the box available (in this example it’s $5)
Step 3:
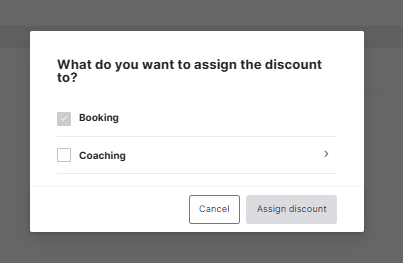
Select which product the Discount applies to, whether:
and Select the ‘Assign discount’ button to apply the discount created.
Step 4:
Usage: select ‘How many times the discount can be used overall’, (this is optional) as is ‘How many times can any one customer use the discount code?’ – up to you if you’d like to set limits on usage or not, be aware that leaving it blank is limitless usage within the time frame selected.
Select the ‘Active dates’ time frame you’d like the Discount to last for, it’s optional to choose an expiry date and then click the ‘Create discount’ button once you’re done creating your discount.

Available discounts (Discounts which have commenced), Scheduled discounts (those not yet within the available date range) and Expired Discounts can be viewed on the Discounts page.
How does a Player use a discount at Checkout?
The player would search for your course or camp the usual way, they would select the course or camps dates as they would normally and then on the order summary page, the discount page would show.
Enter the code and the discount is applied and then they can confirm and pay
Q: What happens if someone tries to enter a ‘fake’ promo code?
A: They will get the error below. If the code does not work, they can continue with the booking without the code.
Q: Are promo codes case sensitive?
A: Yes, they will need to be entered in exactly as you write them.
Q: I think my promo code has been shared with others and being abused. What should I do?
At any point, you can disable the promo code to prevent others from using it. To do this, log into you discounts module, edit the promo code and edit the end date to today. This will automatically update and prevent any further usage. It will move to the Expired Discounts tab.
Q: How do I know who has used my promocodes ?
At present, you can see how many have used the promo codes in the Discounts module. You can download this information by clicking on the download table.
If you click on the name of the code from this page, a further page will open up to list the names of people who have used the promo code and what for.
Q: Can I apply discount codes to courses that do not take an online payment?
A: Yes you can.
Q: Can more than one discount code be used at a time?
A: It’s a core part of the functionality that you can only use one discount code per order.
Q: Will the discount codes be available in other modules in the future?
A: We are developing the discount code module to be available in other modules, i.e. memberships
Bulk Cancellations:
This is a great feature to use when you have multiple bookings that need cancelling and will save you a lot of time!
Within the admin area, you can cancel an individual booking or you can bulk cancel selected bookings.
To bulk cancel court bookings, continue reading this guide.
Step 1:
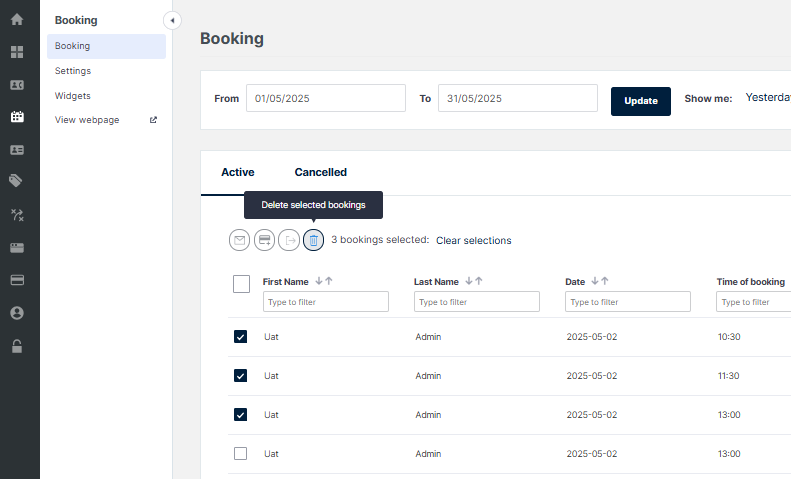
You will first need to head into the Booking Module within the admin area. From here you will need to select the bookings you wish to cancel.
*Tip* – Before you confirm a bulk cancellation, please review your selections to ensure you’re only removing the bookings you intend.
Step 2:
Once you have clicked on all the bookings you wish to cancel, you will then need to click on the ‘bin’ icon (see above)
Here the following overlay will appear, this will allow you to confirm that you wish to cancel these court bookings as well as trigger any refunds. (verify that refunds fall within allowed time frame).
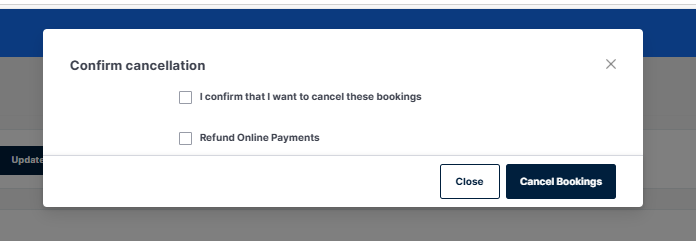
Once you have confirmed that you wish to cancel the selected bookings, you will need to click on the highlighted ‘Cancel Bookings’ button.
The bookings will now appear within your ‘Cancelled’ tab and any refunds will be given.
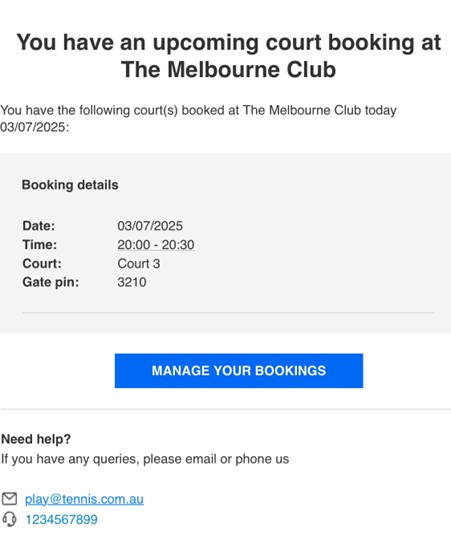
Daily Email Booking Reminders
This is a great new feature where Booking Reminder emails will be sent automatically from Clubspark to players each morning.
These emails will be sent only to players who have a Clubspark court booking (or multiple bookings) for that day.
For players – this will remind them on the morning of their upcoming daily booking(s), plus give them a chance to cancel any bookings if their plans have changed. As a result, this also means more courts will become available for more players
For clubs- this will help free up courts for another player, help reduce the chance of bookers/members not showing up for bookings, and help clubs manage court utilisation.
For Igloohome/BCS court bookers – this is a very handy PIN reminder, particularly for coaches or people with multiple PINS for multiple bookings at multiple venues on the same day. Note, this email will only if the booking is under the ‘Booking’ category (i.e. it will not send if it’s a coaching category booking).
Administrators Guide:
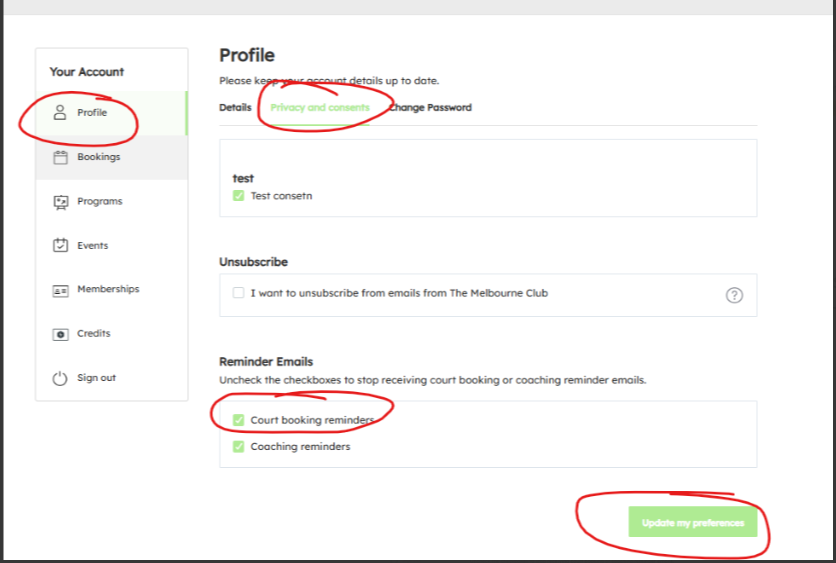
Admins can go to the player/parents’ Clubspark Profile and view the Consents panel to see if a player has subscribed to receive daily booking reminder emails.
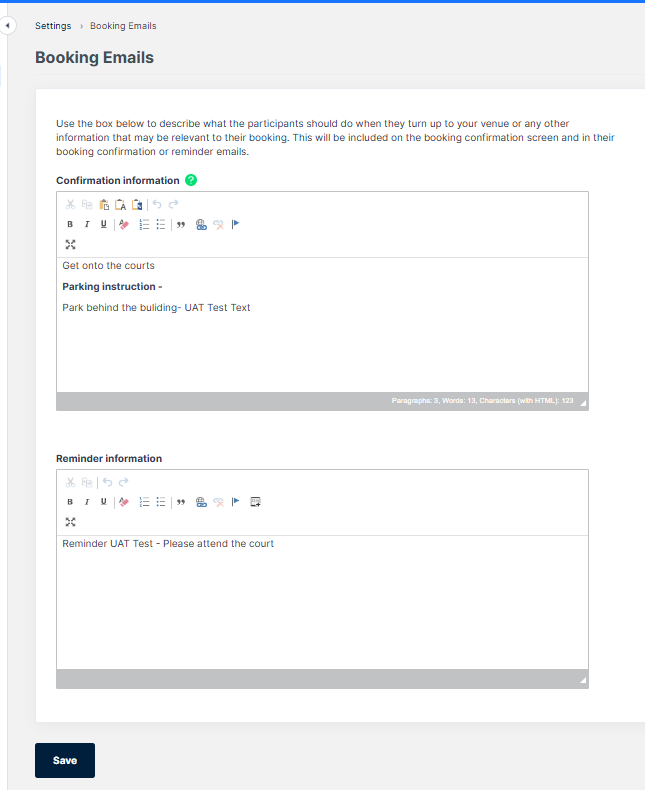
2. As an admin – how do I add custom text to booking reminder emails?
Section 3: Users can unsubscribe from Daily Booking Reminder Emails as per below:
Updated Booking Rules:
In this guide you’ll be shown how to apply the updated booking rules for members, non-member or anyone with a role at your venue.
Benefits to admins include:
To access the new settings:
Step 1:
Navigate to:
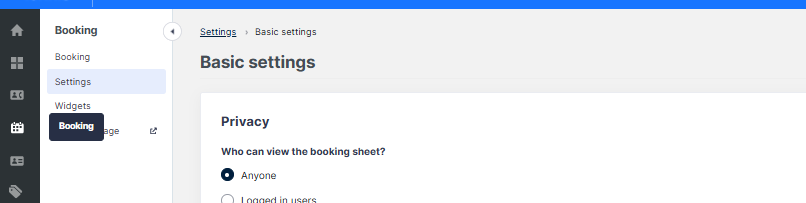
Step 2:
Scroll down till you reach the Booking Rules section.
New:
Booking rules have one new change, the Maximum Bookings per day has been replaced with:

Booking rules allow you to decide – (from right to left as per the image above)
Example:
In the attached image above for “Everyone”, with timings previously set as booking slot duration = e.g. 60 minutes – can be described as:
Advance booking period (days) = 10. This means the player can book up to 10 days in advance of the date they would like to book.
Max bookings during Period = 0. This means the player has no limit to the bookings they can make (add a value if you’d like to change this).
The period is set as
Max bookings period (days) = 1. This means the player can make a booking, every 1 day.
Anything higher than 1, The system will check X days before and after, the date the user is trying to making a booking for. Eg. maximum bookings during a period are 5 and the maximum bookings period in days is 7, this would mean a user is restricted to 5 bookings in an 14 day period as it checks 7 days before and 7 days after the date.
Max booking slots per booking = 4. This means the player can use 4 x 60-minute slots.
Minimum booking slots = 1. This means that that the minimum time of court is 1 booking slots i.e 1 x 60-minute slots = 1 hour minimum time on court
With all of these rules in place, the player can: Make 1 booking, up to 10 days in advance, every day, with no maximum time on court and a minimum of 1 hour per booking.
Step 3:
You also have the option to add rules and apply these to different types of users. E.g. the advanced booking period for a user with a responsibility as a ‘Coach’ could be longer than everyone else. You can add further rules by clicking the ‘Add row‘ tab.
Step 4:
Finally, make sure you save any changes you make by clicking on the ‘Save settings’ button at the bottom of the page before you exit.
Enhanced Administrator Navigation:
All ClubSpark admins—whether at clubs, coaching, MA, or TA—will now see a streamlined navigation panel that makes it easy to move within your current module and jump to others in a single click.
You’ll reach core areas like the booking sheet faster than ever, saving time and effort. The fresh, cleaner design not only looks great but also boosts usability across the entire platform.
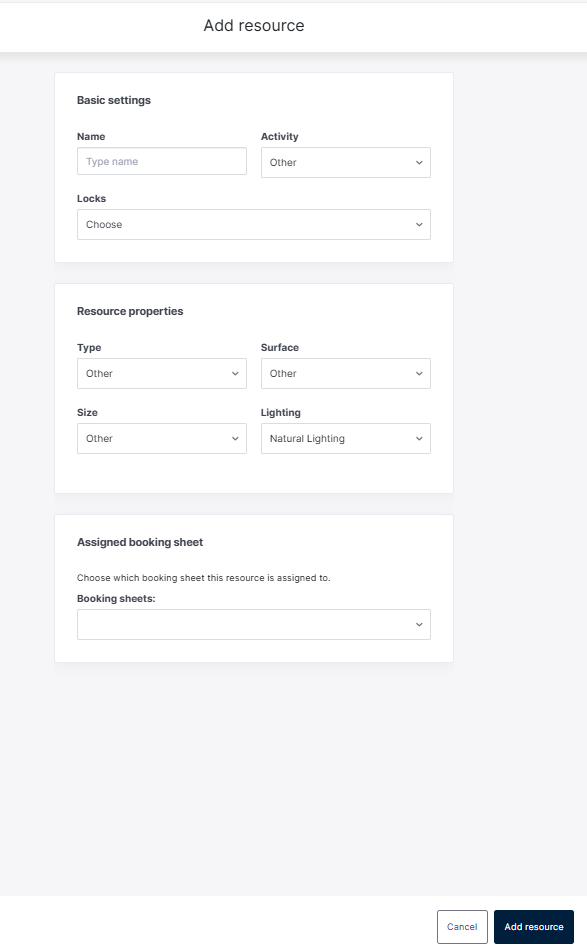
Adding & Managing Resources in the Booking Module
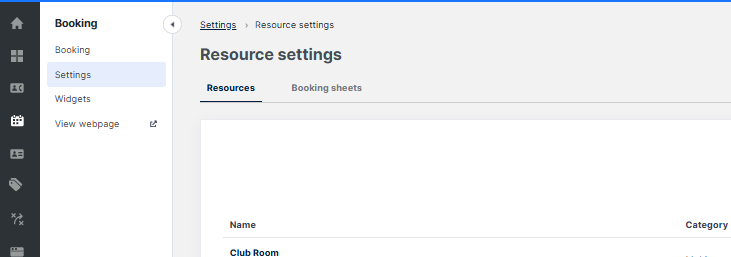
Option 1: Assign to an Existing Booking sheet
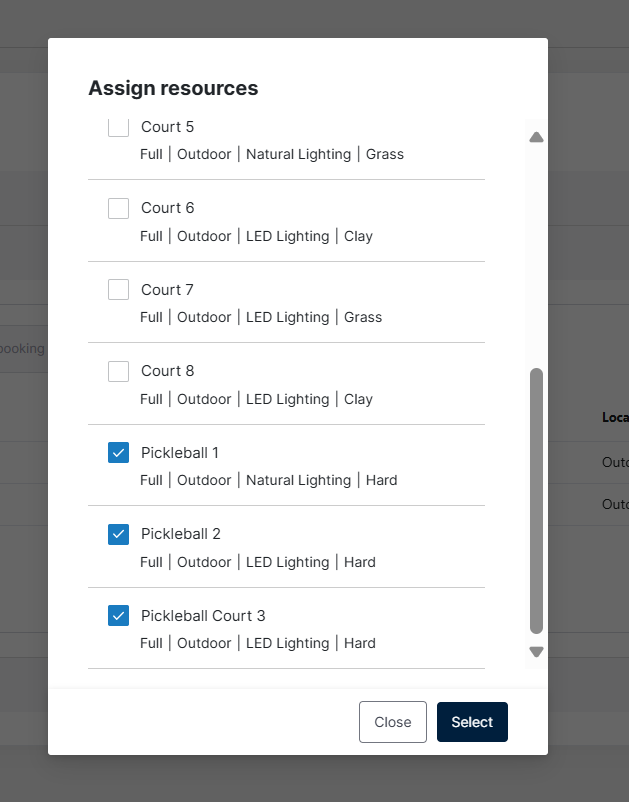
Option 2: Create a New Booking sheet & assign
Tip: You can also edit sheets by removing resources via the same Assign Resources interface.
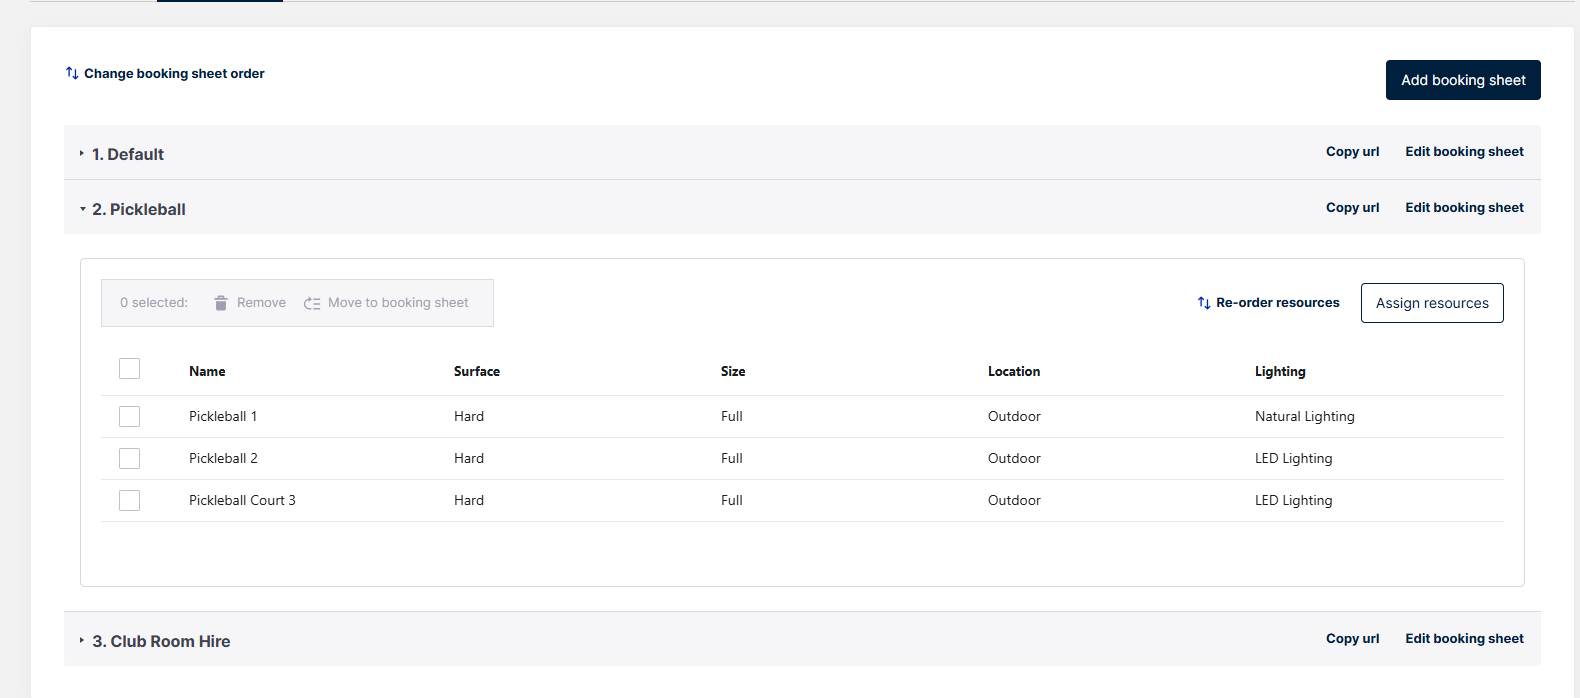
Final: Review Your Changes
Once resources are assigned, go to View webpage in the navigation panel to see your Booking sheets populated with the new resources.

Club Benefits of Multiple Booking sheets:
Venue and club administrators now have more control over facility bookings with our new Resources enhancement. You can highlight individual stand-alone spaces—such as tennis courts, pickleball courts, hitting walls, or ball machines—on their own booking sheets. By creating multiple sheets, you give members and your venue, clear options for hire.
Key Benefits
Flexible Bookings & Higher Utilisation
Configure Resources to maximise court time and support a variety of sports and training formats.
Adaptable for New Activities
Easily add emerging offerings—like Pickleball, Hot Shots, or Pop Tennis—to keep up with member interests.
Revenue Uplift
Broader booking options drive more reservations and unlock new income streams.
Streamlined Operations
Automate online reservations for every facility element to reduce administrative effort and free up staff time.
Adding Schedules to newly created Resources:
Once resources are added to the booking sheet, admins can open the Schedules module to assign or modify rulesets for those resources—or create new rulesets first and then apply them.
We are pleased to inform you that the problem customers were experiencing when attempting to activate their UTR Rating via their player profiles is now resolved.
Thank you for your patience as we worked through this issue to restore normal service.
The Competitive Play Team
Tennis Australia is currently aware of an issue related to customers attempting to activate their UTR Rating via their player profiles on Match Centre or Tournaments.tennis.com.au:
We understand and apologise that the service disruption is impacting your Tennis experience and we are working to restore normal service as quickly as possible.
Once the issue is resolved, we will provide an update on support.tennis.com.au.
The Competitive Play team.