Include attachments (picture only) to your mailing – from the membership module

Platform/Product/Module: ClubSpark – Memberships
Function: Emailing members using ClubSpark


Clubs have the ability to email members directly from ClubSpark and add a personal picture file to their mailing.

Note:

if you want to add a file, other than a picture, as an attachment you’ll need to do so via the Contacts module, and select the relevant members from the membership you want to send a file to.
You can also insert an URL linking to the dedicated file or to one of your website’s subpage which includes the file


1.

From the selected membership, tick all the members you want to write to and click on the mail icon.


2.

In the mailing pop up window, click on the little picture icon in the message section.


3.

From the Image Properties pop up window, click on Browse Library


4.

In the File Library pop-up window, select Images, click on the upload button in the top-left corner, and browse your computer’s files to find the relevant picture.


5.

Click on the uploaded picture to add it to your mail & click OK

Add a Junior member to a Junior Membership

Platform/Product/Module: ClubSpark – Memberships
Function: Add a Junior to an existing Junior Membership package manually


After you’ve created your junior membership, you might want to add junior members manually to it.

Note:
Remember, Junior age is defined in your club’s Profile module


To add a junior member to an existing junior membership package follow these steps:


1.

Click Add member (or select member option dropdown menu, then add member)

Add a Junior Member


2.

Fill in the Parent/Guardian details (this will be the main contact for the new junior member).

Parent-guardian details


3.

Fill in the Junior Player details (they should be different from the Parent/Guardian’s one). These are the details of the person using the membership.

Junior Detail


4.

Indicate how the new member has heard about your club in Source and click Save.

You should now see the new member appeared in the dedicated junior membership!


Remember:
Communication mails can NOT be sent to junior contacts, only their main contact (parent/guardian) will receive any emails the club sends.
If, in the future, you’d like to change or update the Main Contact details, head to the Contact Details section of your Junior member and click on Change main contact.


Change main contact


Need more help? Contact Customer Support on 1800 752 983 or email [email protected]

League Manager & Match Centre Update – Friday 27 August

Please note the following release updates to League Manager and Match Centre on Friday 27 August, which includes the following:

League Manager

  • Ability to Print Ladders for competitions that your organisation administers or participates in via Results Management > Print Ladders
  • Fixed Roles & Rights functionality issues and simplified access rights for various user roles: Competition Manager, Teams Administrator, and Results Entry Manager
  • Updated Report access based on user Roles & Rights, ensuring role types access only relevant reports
  • Fixed report outputs for the following reports:
    • All Facility & Venue reports
    • Organisation Payments
  • Fixed squads locking and preventing players being added during team nomination open period
  • Minor bug fixes

Match Centre

  • Fixed result entry incorrectly displaying Cancel Reason selection on completed rubbers
  • Minor bug fixes

The user guide for Roles and Rights in League Manager can be found HERE.

The user guide for the Print Ladder function in League Manager can be found HERE.

If you have any questions please don’t hesitate to contact our friendly team on 1800 PLAY TENNIS (1800 752 983) or email [email protected]


Are you an association or club administrator interested in using League Manager (Tennis Australia’s free online competition management system) for your competitions? Please click HERE for more information.

Import members from an External system to ClubSpark

Note:

If you’re importing from My Tennis 2, ensure that facilities in My Tennis 2 aren’t deleted, as they have links to League Manager and other areas that use this data. Changes may have unintended consequences. If you need to make changes, please contact the Customer Support team at [email protected].


1st step: Join ClubSpark (for those who haven’t)


1.
Fill out an Expression of Interest form ➡️ (link to EOI)

2.
Jump on the next available training session

3.

We’ll set up ClubSpark for you 🙂


2nd step: Import members and memberships to ClubSpark (Ask your CDO/TDO for assistance with this step)


The 2 things a club can do while waiting for your CDO/TDO are:

  • Make a list of all active membership packages, including their information, that you want to move to ClubSpark. The cost and dates fields should be up to date before the import, as they can’t be changed in bulk after the import.
  • Clean the membership package export spreadsheet with your active member details (see section 2. how to export the spreadsheet), and double check that email addresses and phone numbers are up to date and that there are no duplicate rows.


Guided Steps For Club Admins

Note:
The membership package details should include:

  • Name of the membership
  • Type (Individual or Group)
  • Category (Adult, Student, Junior, Veteran, Family, Other)
  • Dates (Start & Expiry or Date of Purchase
  • Payment Method (Credit Card if a Stripe account is connected, Cash, Other (ETF), Cheque)
  • Costs


Method 1: (preferred method for importing only active memberships to ClubSpark) Guided Steps for CDO/TDOs


Guided Steps For CDO/TDOs


1.

Start by setting up your current membership(s) in ClubSpark.


a) Go into each membership package in My Tennis 2


b) Open a new tab and go to your ClubSpark account, head to the membership module, and create a new membership package by clicking the “+New Package” button.


c) Copy the relevant information from one membership in My Tennis 2 to each new package in ClubSpark (Title, summary, date, cost, etc.)


2.

Import your members to each relevant membership package one by oneTo do this you will need the help of your CDO/TDO. 


a) Go to reporting in My Tennis 2 and export the excel spreadsheet with members from the specific membership package.


b) Go to your ClubSpark account, find the membership package you’ve just created, and download the import template from your new package.

Note:
Each type of package will have a different template that will give you the right examples and structures to export your members (adults or juniors) correctly.


c) Copy the info by columns from the My Tennis 2 report to the ClubSpark import spreadsheet template and complete the missing fields.

Note:

  • The mandatory columns to fill are A to H (Contact ID to Paid) + DOB. However, we strongly advise you to fill as many columns as possible so that each of your club’s member have less work to do to update their account details in the future
  • If you don’t have any ContactID assigns to your members you can just pick random different numbers like 1, 2, 3, etc. otherwise use the My Tennis ID
  • For “date of purchase” membership packages, the start date will be set to the day that the import is completed.
  • For Family Membership, family members will automatically be connected when doing the export on MT2 so you just have to copy members info across
  • For Junior Membership packages, you have to assign a parent to each junior – your club’s memberships will become easier to manage in the future. Make sure that the PrimaryContactID for the junior is the PrimaryContactID of the main contact (parent/guardian), so that the child is linked to the main contact, as shown below:

  • The gender options in import members file will only support abbreviations (e.g. f/F for female or m/M for male)
  • Finally, make sure that the format in each columns is respected (for instance, phone numbers should be in Text format and indicated as in the template: 0425683377 ⬇️)


d) Save the edited template in your files.


e) Click on the Import button to import your members to your newly created ClubSpark membership.


Please Note:
After the import, you might see dummy parents IDs that cannot be deleted, which have been created when importing the juniors memberships from MT2… we would recommend that the club gather the contact details for each of the parents and then update these dummy profiles with the right information (follow the steps for a non registered account in this support article).


Second Method: (if your club also wants to import expired, lapsed or cancelled memberships to ClubSpark)


If you have different type of membership packages (e.g. inactive, active, pending or lapsed) to import in ClubSpark, you can fill in the following import spreadsheet. And import that spreadsheet in the Import members of the View all members.
⚠️ You’ll still need to create each membership package in ClubSpark and make sure that the Package names in your import spreadsheet are exactly the same than in ClubSPark!


And click the Import members button once you’ve filled & uploaded the import spreadsheet file.


Note:

  • The mandatory columns to fill are A to K (Package Name to Paid), DOB & the last column (MembershipStatus). However, we strongly advise you to fill all the columns so that each of your club’s member do not have to update their account details in the future.
  • If you don’t have any ContactID/PrimaryContactId assigns to your members you can just pick random different numbers like 1, 2, 3, etc. otherwise use the My Tennis ID
  • For “date of purchase” membership packages, the start date will be set to the day that the import is completed.
  • For Family Membership, family members will automatically be connected when doing the export on MT2 so you just have to copy members info across
  • For Junior Membership packages, you have to assign a parent to each junior – your club’s memberships will become easier to manage in the future. Make sure that the PrimaryContactID for the junior is the PrimaryContactID of the main contact (parent/guardian), so that the child is linked to the main contact, as shown below:

  • Finally, make sure that the format in each columns is respected (for instance, phone numbers should be in the following format indicated in the template: 0425683377)


Need more help? Contact Customer Support on 1800 752 983 or email [email protected]

-VIDEO: ClubSpark – Training Webinar Recordings

Platform/Product/Module: ClubSpark software – multiple modules
Function: Provide recorded instructions and information for key modules of the ClubSpark software
Context – when/why use this? You are new to ClubSpark or need a refresher on module functionality
Need more help? To register for an upcoming session click here.


If you can not make our online training sessions, would like a refresher, or would prefer to work through the modules at your own pace please refer to the below recordings of one of our online ClubSpark training sessions:

Introduction and Contacts Module Click here
Membership Module Click here
Events Module Click here
Programs Module Click here
Booking Module Click here
Website Module Click here


If you can not make our online training sessions, would like a refresher or would prefer to work through the modules at your own pace please refer to the below recordings of one of our online ClubSpark training sessions

To register for an upcoming session click here.

USER GUIDE: ClubSpark – User Guide for Tennis Club Admin

Platform/Product/Module: ClubSpark – All Modules
Function: Full user guide for the ClubSpark platform
Context – when/why use this? Assist Club Administrators to set up, maintain and troubleshoot working with the ClubSpark software
Need more help? Contact Customer Support on 1800 752 983 or email [email protected]


A full user guide of the ClubSpark platform has been developed to assist club administrators. Simply click on the link below to download or print the PDF document.

ClubSpark user guide for tennis clubs

If you have any questions, please don’t hesitate to contact our team on 1800 PLAY TENNIS (752 983), [email protected] or through our Live Chat function. Alternatively, get in touch with your local State representative.

Player Types in League Manager and Match Centre

Background

Previously in League Manager, there were four different player types: Base Player, Reserve Player, Emergency Player and Fill-in Player.


As Reserve player and Emergency player were being managed and displayed the same way across the platforms from a system perspective, a decision was made to remove Emergency player as an option in League Manager and Match Centre. This change has been done to streamline and simplify player tags for users in the system.


The impacts of this change is described below.


LEAGUE MANAGER

Within League Manager, the changes are as follows:

Change 1: Change to tab when viewing squads

  • When displaying the squad in League Manager, the ‘Reserve & Emergency Players’ tab displays as ‘Reserve players’.
  • The Emergency player tag will no longer exist, and all previous tags of Emergency players have changed to Fill-in player tags.

Old:

New:


Change 2: Removal of ‘type’ column

  • Since there is no need to distinguish Reserve players from Emergency players, the ‘type’ field will be removed when viewing the ‘Reserve players’ tab.

Change 3: Change to options in changing the player type

  • When viewing the ‘Base players’ tab and selecting the option to change the player type, ‘Change to Emergency player’ will no longer be available.

  • When viewing the ‘Reserve players’ tab and selecting the option to change the player type, ‘Change to Emergency player’ and ‘Change to Reserve player’ will no longer be available.


Change 4: Fill-in players can only be added against the match scorecard and not the team profile

  • When wanting to add a Fill-in player, the player can only be added during the result entry process OR scorecard for the match and not the Edit Squad feature.


MATCH CENTRE

Base players

There is no change to how Base Player displays within Match Centre.

Reserve players

Reserve players are considered part of the squad and match cards/tiles/ladders/competition appear on their Match Centre profile the same as a base player.

Team Profile: They appear on the Team Profile under Reserve Players as shown below:

Scorecard: When editing or entering a score, Reserve players are indicated by (R) next to their name, for both the player select and completed scores

Fill-in players

Fill-in players do not appear on the team profile in Match Centre.

Team Profile:

Scorecard: When editing or entering a score for a match in which a player has been a fill-in, they will appear in the dropdown for that match with an (F) next to their name.

Fill-in player profile:

  • Only the relevant Match card (previous/upcoming) for which the fill-in player was utilised appears on the Match Centre profile of the fill-in player.
  • No ladder tile will appear for the fill-in player
  • The competition will not be listed in the fill-in players competitions element if they were just a fill-in and not a Base or Reserve Player.


Courts – Customise the order of courts on your booking sheet

Platform/Product/Module: Clubspark – Bookings – Courts
Function: Configure the order that courts appear on the booking sheet. It is possible to display your courts in a custom order on the booking sheet, instead of numerical order.


Clubs have the ability to display the courts/resources on the booking in their own custom order.

1.

From the Booking module, click Settings then click Manage resources.

2.

Click the Booking sheets tab then click Re-order resources.

3.

The following overlay will appear, simply click on the dots next to the position number, hold and drag the resource/court to the desired order.

Once in order, click Confirm.

The booking sheet will update according to the new order you have set.


Need more help? Click here for a video on managing your courts

OR

Contact Customer Support on 1800 752 983 or email [email protected]

Book a Court Update – April 2018

We are pleased to announce several enhancements and changes to the Book a Court software will be released on Friday 27 April.

Details of the release are below.

Delete contacts & merge contacts

Administrators now have the ability to delete a contact record. Note, records can only be deleted if they do not have an account or a membership associated with them. Deleted contacts can be restored if required. Administrators also have the ability to merge contacts, click here for the support article.

Book current time slot

The current time slot can now be booked. Previously, once a time slot had started administrators and players could no longer book the current slot. For example at 8:01pm, the 8:00pm slot could no longer be booked. This change allows for more flexibility in bookings, particularly those booking at the site. It is important to note the booker will be charged the full price for this time slot and it may take up to 10 minutes for their PIN to activate and allow entry.

Payment gateway fee

The payment gateway fee has been changed to 3 per cent per credit card payment (minimum $0.35) to align with other Tennis systems. As per the current operations of the system, the fee is deducted from the total payment amount. For payments between $0.01 and $11.51 a $0.35 fee will be deducted.

For example:

If the total booking cost is $20.00, $19.40 will be transferred to the venue’s bank account.

If the total booking cost is $10.00, $9.65 will be transferred to the venue’s bank account

Walk Me

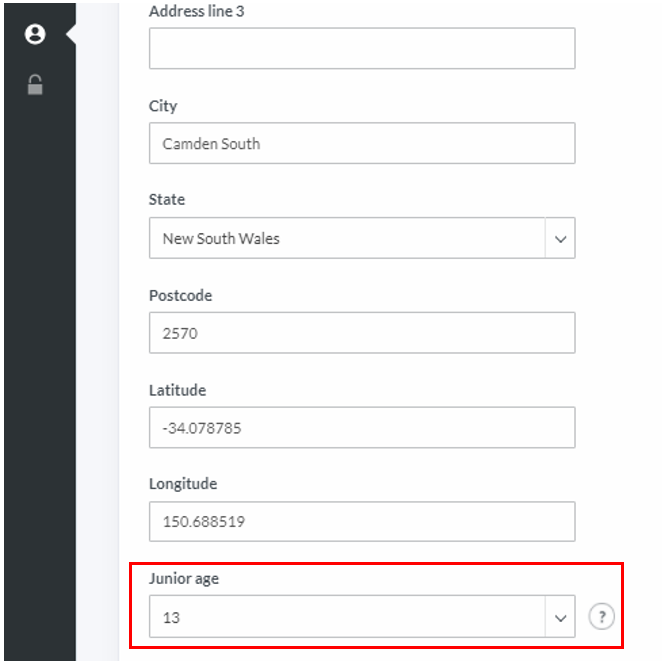
Walk Me is a training tool to provide a step by step guide through important features and provide tips throughout Book a Court. We have introduced two walk through scenarios: Adding a membership package to a contact and creating and managing schedules. Additionally, several information icons are now embedded in the platform, which you can hover over to learn more about a particular function or field.

Over time we will continue to introduce new walk through scenarios and tips to make the use of Book a Court even easier. If you have any particular functions or processes you think a walk me would be beneficial for please let us know.

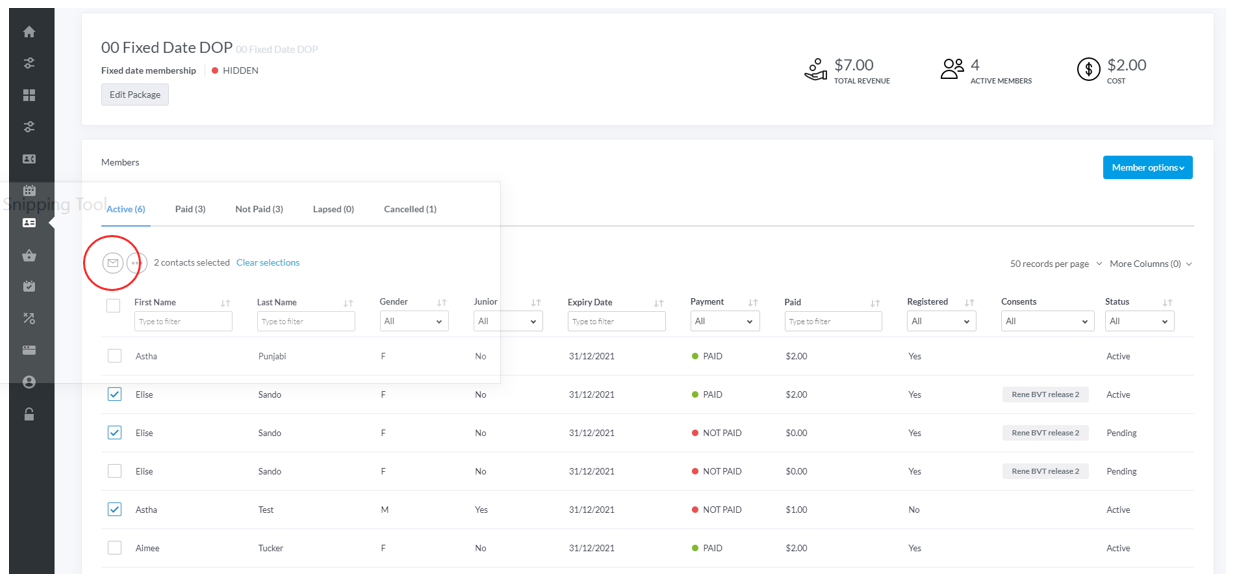
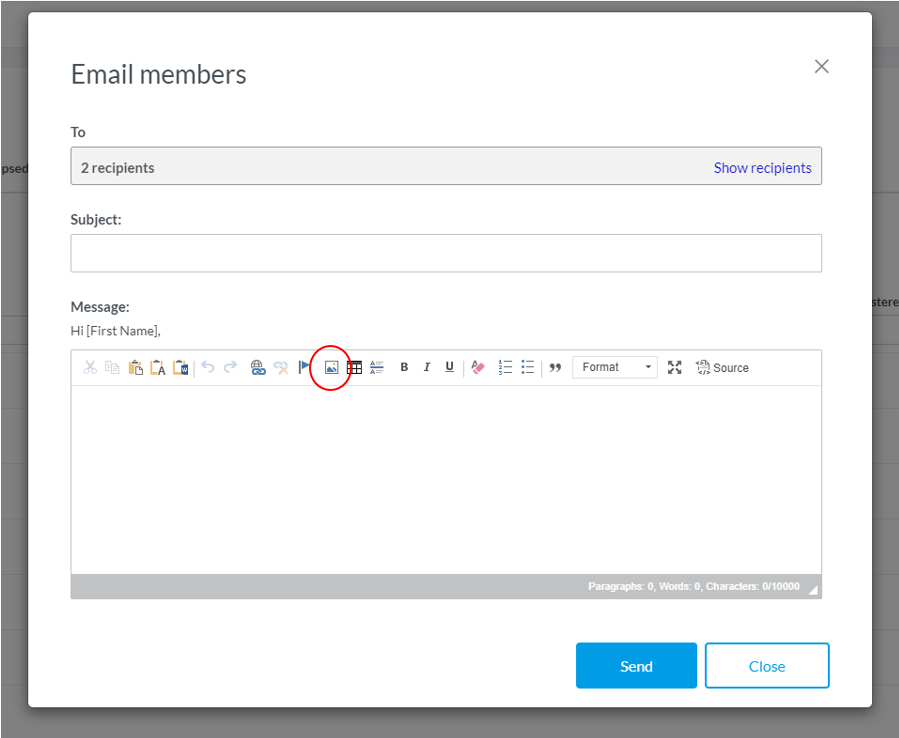
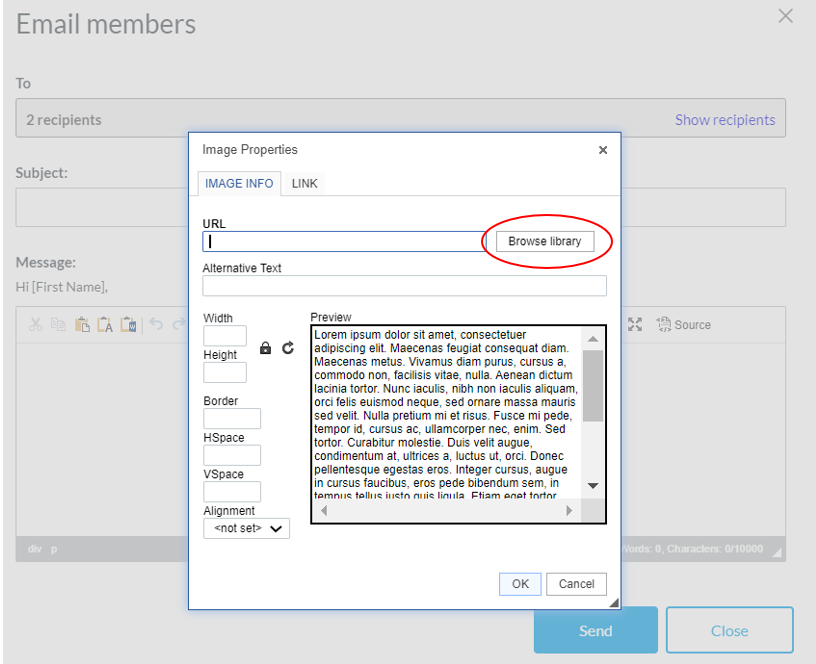
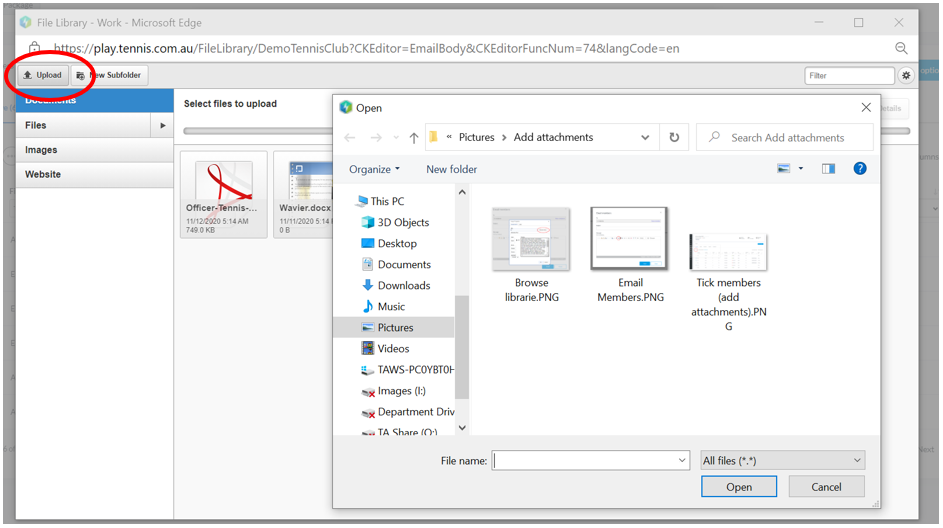
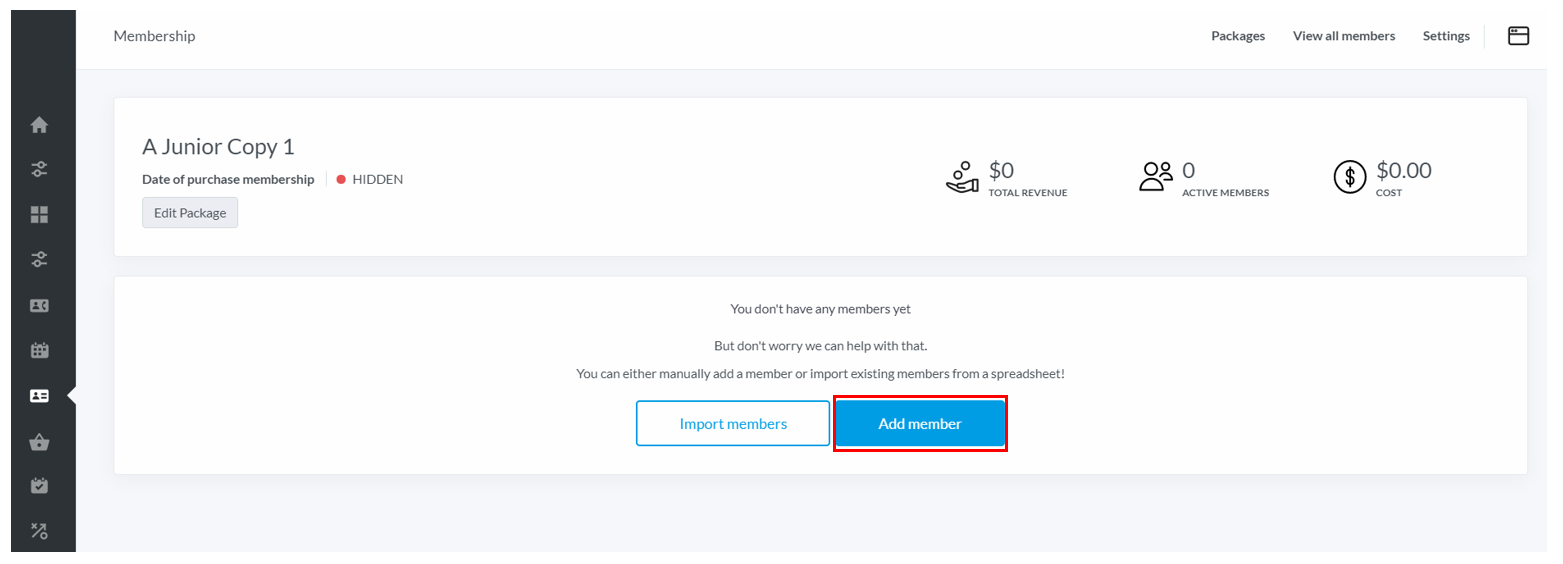
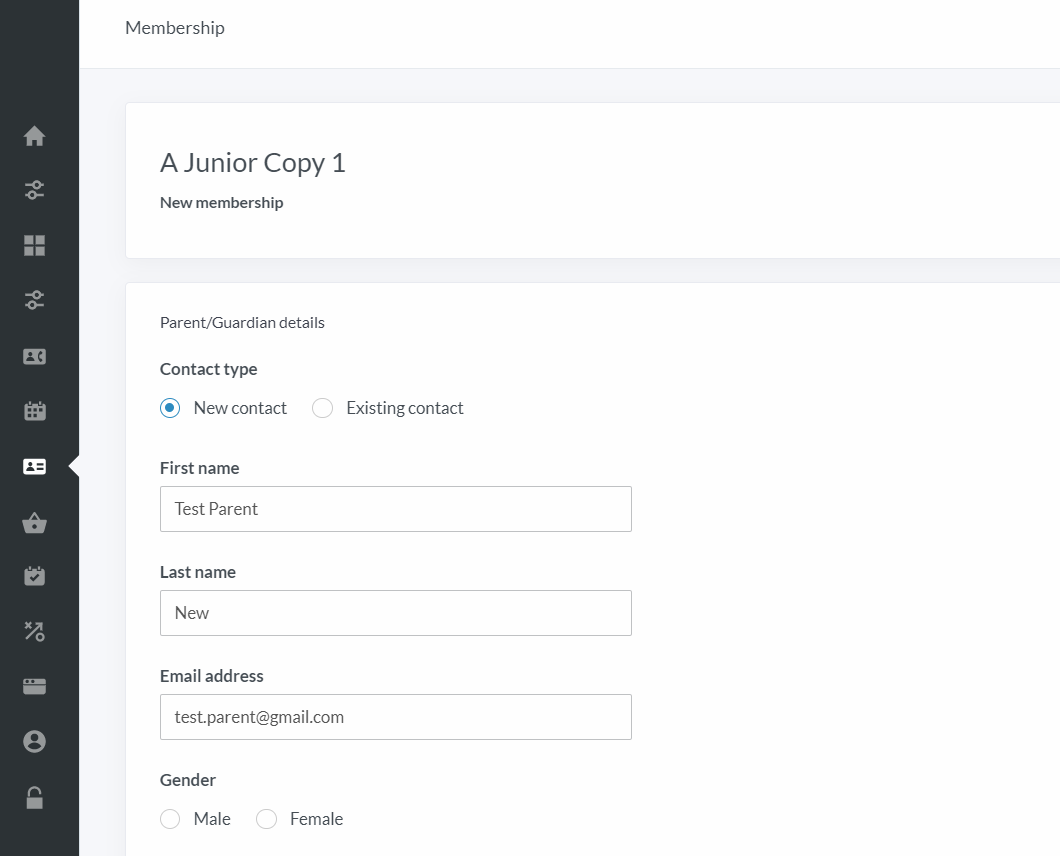
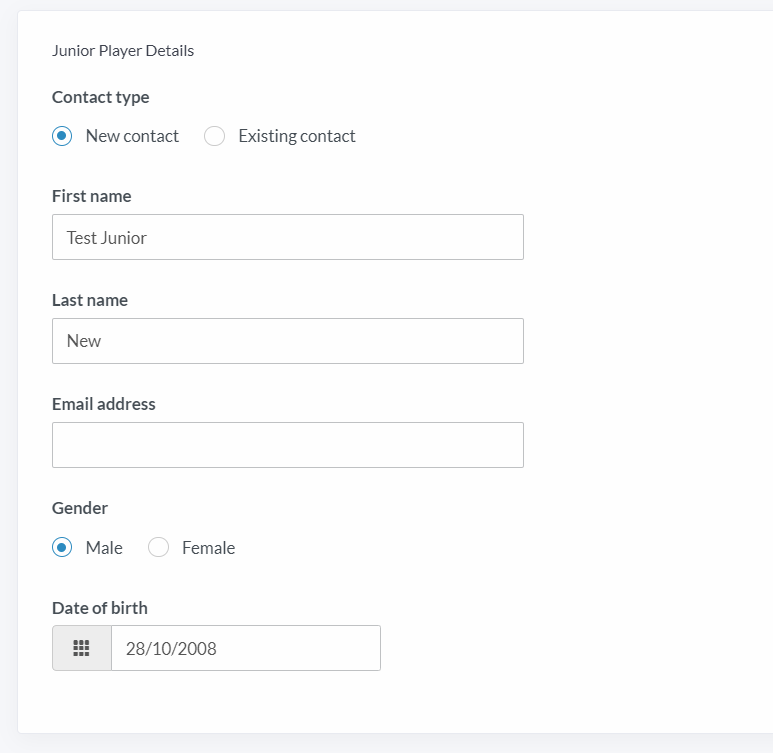
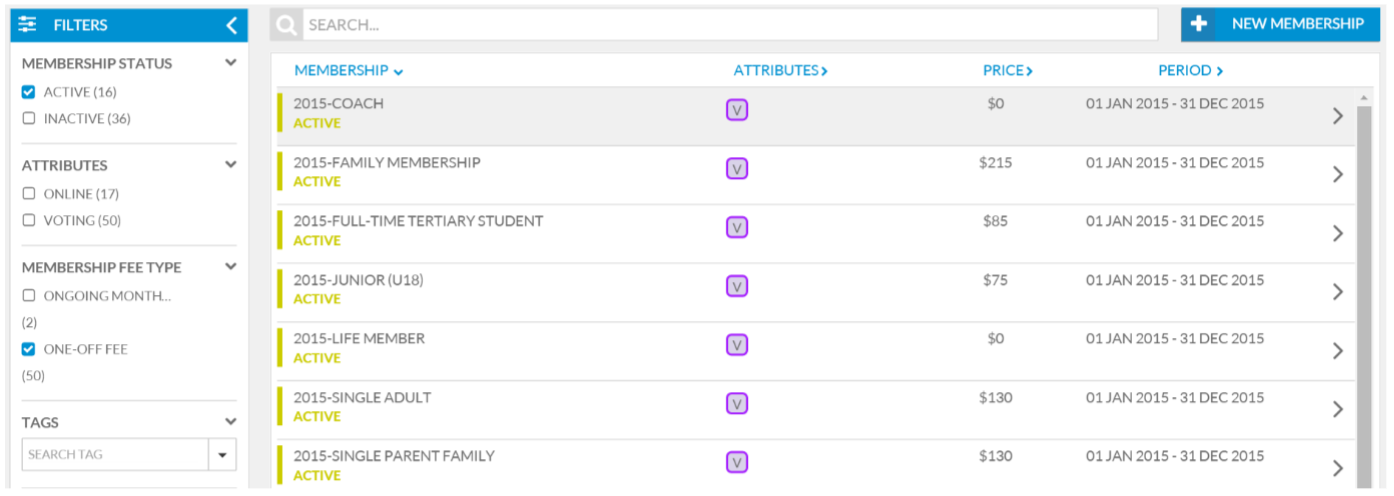
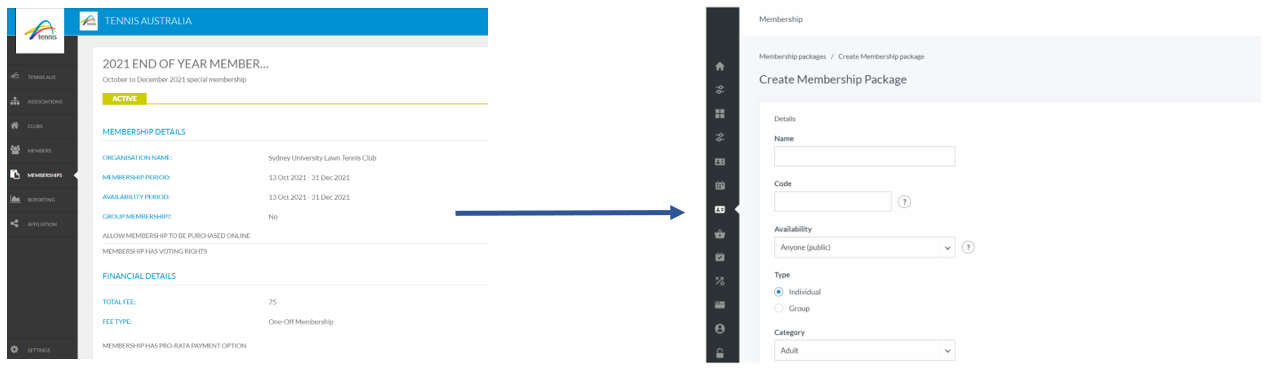
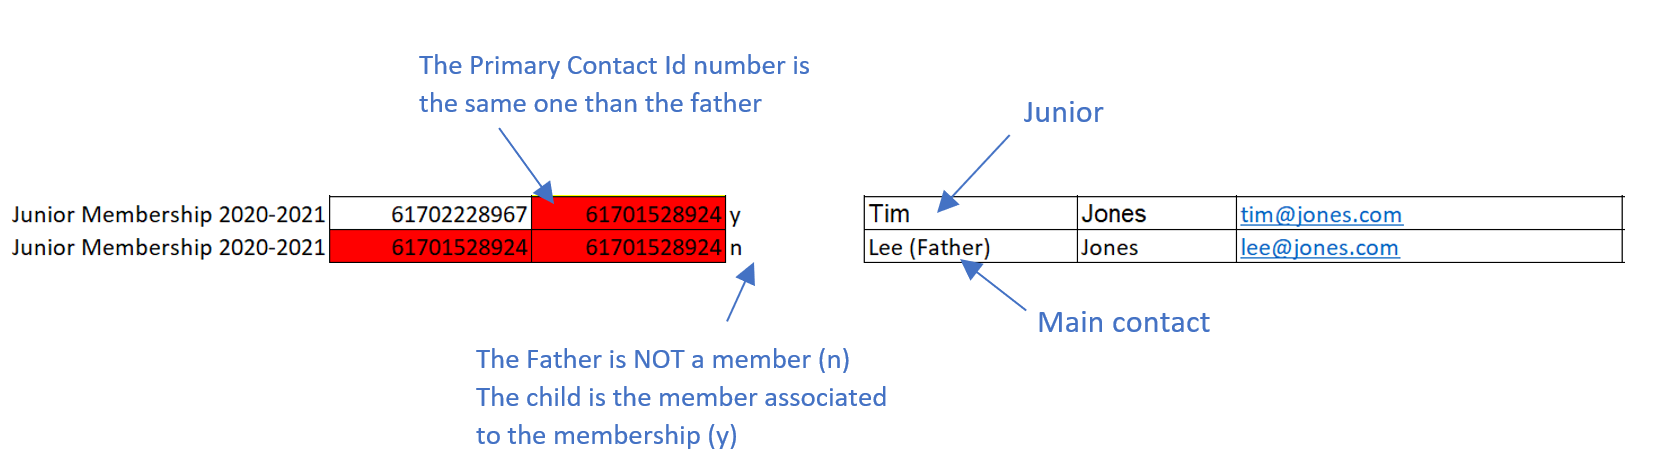
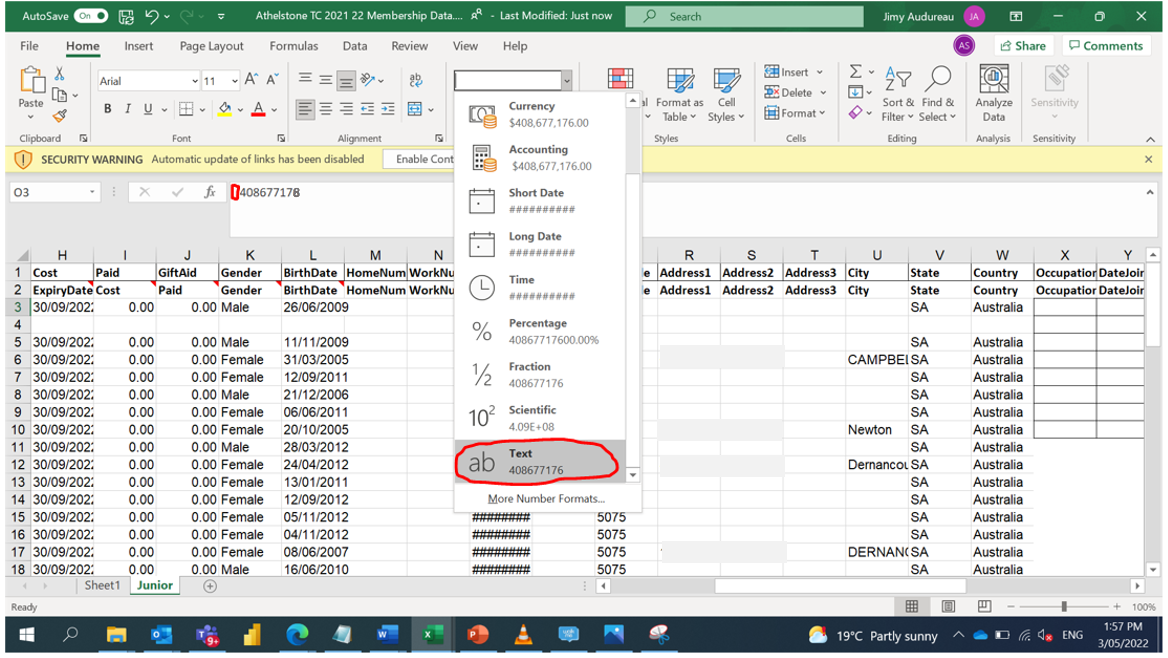
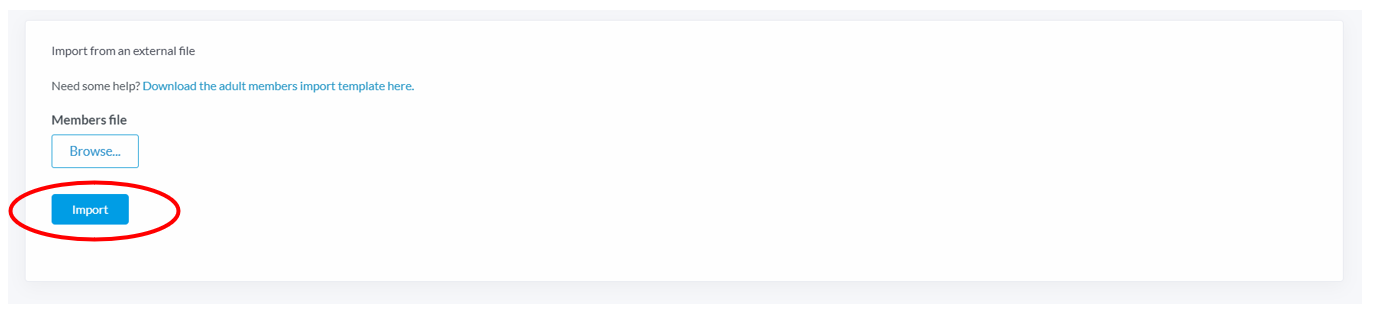
Add membership packages to a contact

Administrators can now add a membership package to a contact allowing them access to member court booking pricing without the need to contact customer support or rely on weekly updates by Tennis Australia. Tennis Australia will continue to monitor your memberships and update regularly with increased focus during the renewal period. Click here for the support article or check out the new walk through in Book a Court, which will take you through the process systematically.

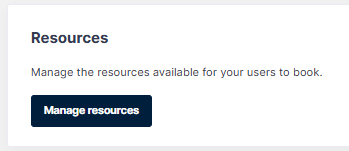
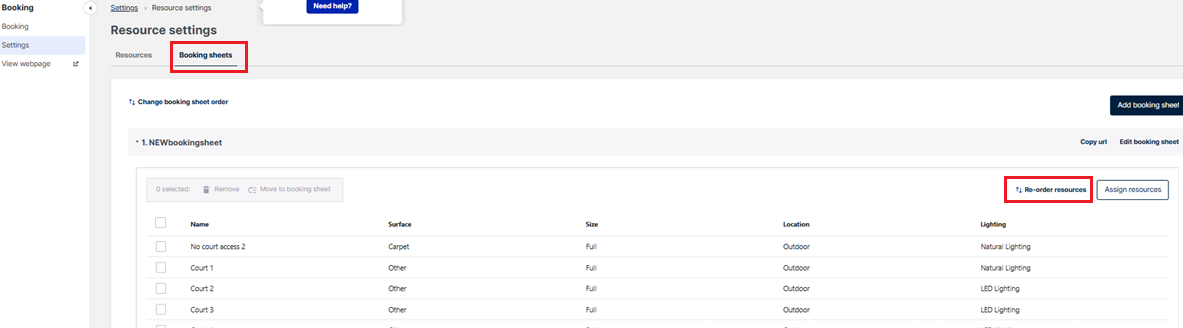
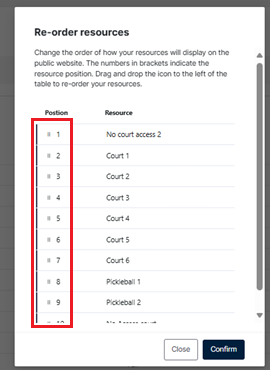
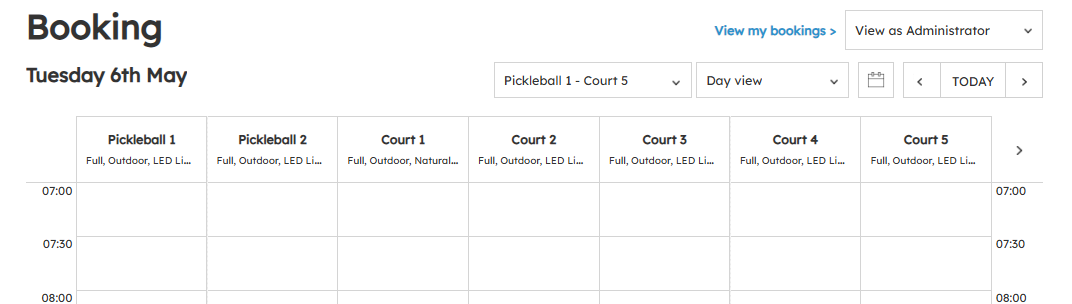
Customise court order

Venues who wish to customise the order in which courts appear on the booking sheet, rather than appearing in numerical order can contact Tennis Australia for this to be updated.

Menu and appearance changes

You will notice some changes to the main menu in Book a Court.

The settings button no longer appears in the main menu however you can access the settings by clicking Booking > Configuration. You might notice some of the settings are in a different order but everything you need is still there. If you cannot find something, feel free to contact our Customer Support team who will be more than happy to assist.

In addition, when you login you will no longer be taken to the bookings page, you will land on our new homepage, which will make it easier to navigate to different areas of the system.

You can now search for contacts from the top menu bar on every page, rather than having to enter the contacts module.

Unique ID

We have given all contacts at your venue a unique ID. This will make it easier for you to identify contacts and for us to provide support. Contacts will not have visibility of their ID and this will only be available at administrator level.

Grace period

The ability for administrators to edit the grace period of a membership package has been locked to eliminate issues experienced previously with this feature. All current grace periods will remain the same and if you wish to change any grace periods, this can be completed upon request by the Customer Service team.

League Manager Update – Tuesday 11 July 2017

League Manager Update – Tuesday 11 July 2017

We’re pleased to announce a number of updates to League Manager and Match Centre.


League Manager New Functionality:

  • Delete Scheduled Matches
  • Add Rounds to Divisions (No longer requires each match to be manually added one by one)
  • Delete Rounds from Divisions (provided no results have been entered)
  • Run a Facility Planning (Court Availability) Report
  • See an Activate Finals Prompt once all match results for a division have been entered
  • Generate a Draw Seeds Report during the League Builder process

League Manager improvements/changes:

  • See player types (e.g. Base, Reserve, Team Manager) on the League Squad Overview report
  • Filter Teams on the Teams Overview page by League Status as well as League & Facility
  • Select odd numbers in the age restriction settings when creating a League (E.g. 11&Under, 13&Over)
  • View Child organisations that are linked to your Organisation
  • Organisation Logo (if uploaded) will now appear on download/print scorecard option
  • Increased Filter options within the Reports section


Match Centre New Functionality:

  • Team Search results will now display the League and Division in which that team is competing in as well as the Organisation and State.
  • When adding a player to a match, the search results will now display the players meeting your search criteria along with the Organisations they are linked too
  • Ability to reset the pre-filled player selections per player
  • Out of Time option has been added when marking a match as Not Played/Incomplete


If you require more information or assistance at any time please call 1800 PLAY TENNIS, email [email protected] or get in touch via the Live Chat function available in League Manager and Match Centre